
First Steps
Before the actual projects starts, there were some things I wanted to set up previously. Mainly, a github repo for my game as it would significantly be easier for file management if something were to corrupt as well as the fact that I would be working on this project via multiple devices, I needed to set up these devices with their own SSH keys and logins which allowed me to properly function with github.
I also had to setup IDE’s and Unity hubs across all of these devices that would allow me to work on all of these.
Main PC – IntelliJ Rider IDE
Secondary PC – Visual Studio 2026 IDE
Laptop – Visual Studio Code IDE
For my first steps, coming up with a project name was very difficult and one of the very early ideas I had was Tower Chaser, which is what the project name ended up as, however the actual game name will be: Tower of Heaven. ToH, for short.
Movement
For the very first part of my project, I had to get started on a movement system, the main features of it that I wanted are walking / running, jumping and wall-jumping.
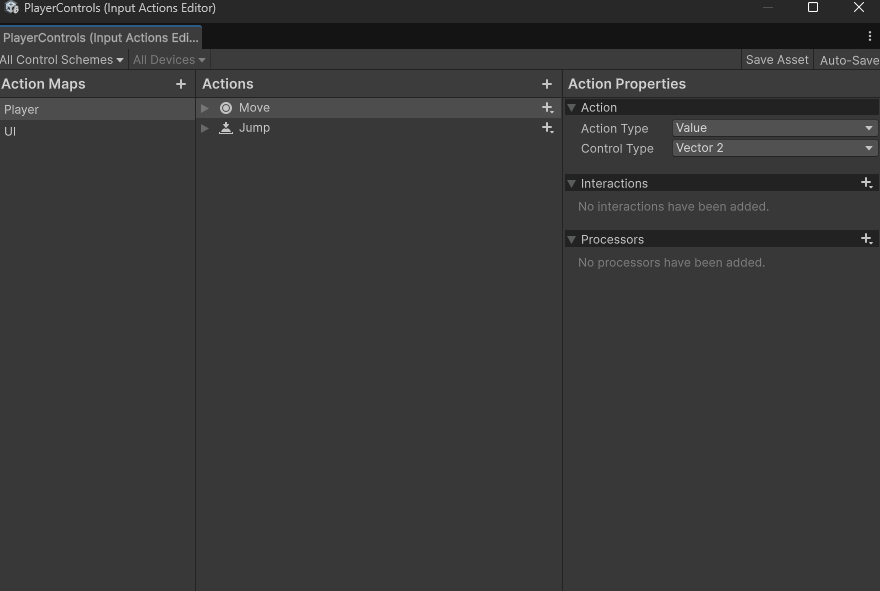
Here, I got my very basic 2D movement (A and D) to go Left/Right as well as the input for my jumping however I had to actually put these into code so that they would do something.
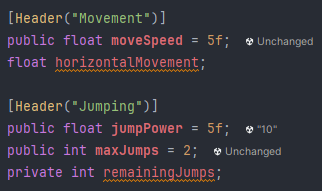
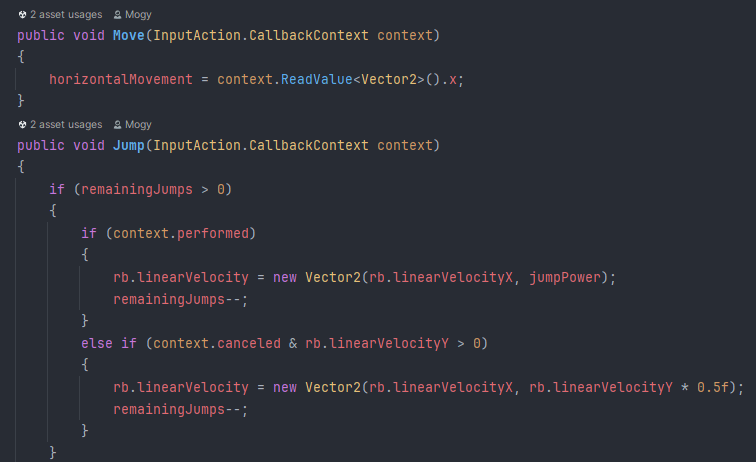
I started off by stating all of my variables that I would need, such as moveSpeed, horizontalMovement and all of my jumping modifiers that are needed for the game to process and simulate how gravity functions.
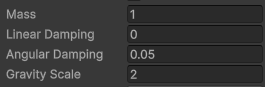
I change my player settings to these for the base gravity affecting the player character in the Inspector.
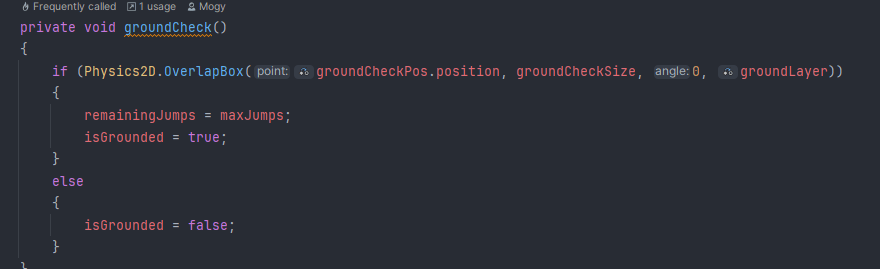
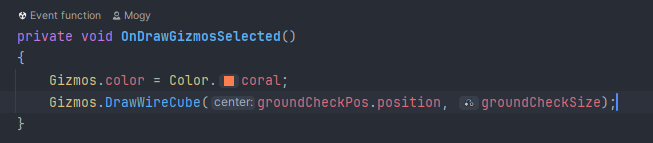
I noticed that whenever I would jump, nothing would stop me from jumping an infinite amount of times, therefore I added a groundCheck function which draws an invisible box at my character’s feet which detects whether or not they are touching the floor, whenever the character interacts with the floor, they get back their maximumJumps which is default set to 2, which allows the player to double jump as I thought it would be nice for additional movement.
Spritework
It was then at this point that unfortunately, I realised very early on that I would need to get Spritework done very early on so that I could instantly play with sprite assets and not have to worry about them.
All of my pixel art was done on https://www.piskelapp.com/ which is a browser app that one of my friends recommended to me

I had gotten a lot of inspiration from Your Only Move Is Hustle to create the protagonist of the Tower of Heaven: “John Tower” where the character in themselves was very plain to draw but they had a single piece of them that particularly stood out – I decided to make this a striking yellow cape, I had drawn very crudely (on purpose) animations for the character, an idle animation where they are bobbing up and down, a running animation where the cape moves, a jump and an animation for being in a wallclimb.
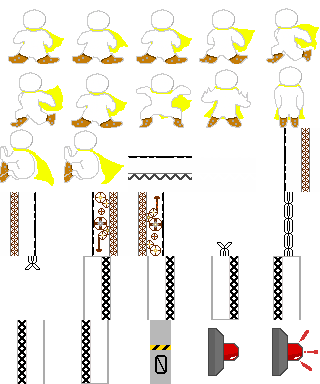
Very soon after, I got to work in creating assets for the game, walls, floors, chains, and doors. As well as giving John Tower the iconic set of Rocket Boots that he has, allowing for a canonical explanation as to his ability to double jump. In Unity, I had went and made my camera background a Chocolate Brown to symbolise more of an Industrial look, deep inside of a forge without it being either black or grey, a sort of steampunk aesthetic.

Movement part 2
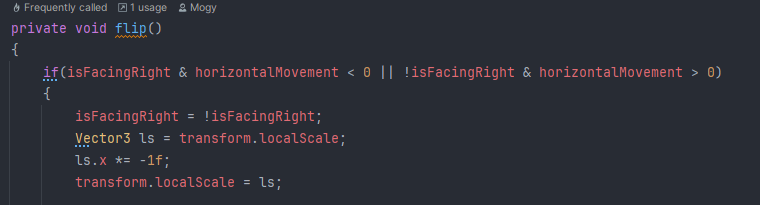
After I had assets which would end up making my rooms, I decided to move back to coding and work on an automatic flip of the character sprite depending on the way that they were facing. This was done simply by just making a boolean which questions whether the character isFacingRight or if it was Not(!)FacingRight, in which case it would just flip the sprite’s scale on a negative X-Axis.
After I made all of my assets, I decided to get working on rooms to create and to start working on a walljump function in my playermovement script.
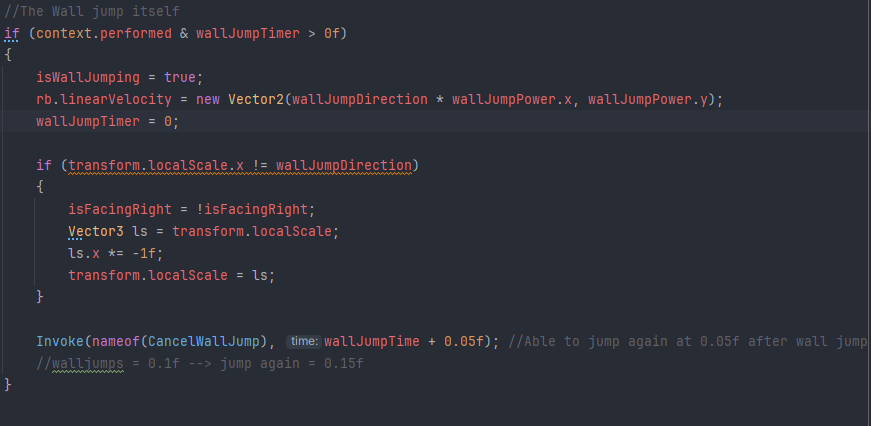
This is the function that calculates jumping off of a wall inside of my context action on spacebar which makes the character jump, forces a sprite flip when jumping the other way and also has additional math for being able to jump right after grabbing onto a wall.
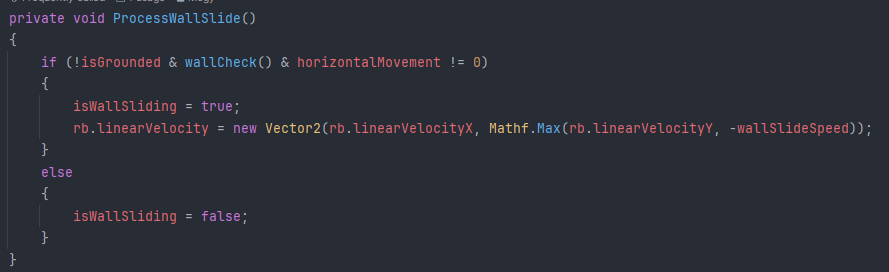
This is additional code that calculates the actual grabbing of the wall which then lets the player jump off of it.
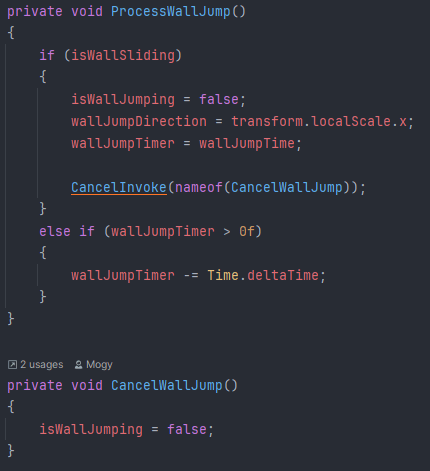
and here is the main part that actually lets the player walljump and how that works purely off of checks whether or not the player is already jumping or can’t jump yet since they are still on a timer.

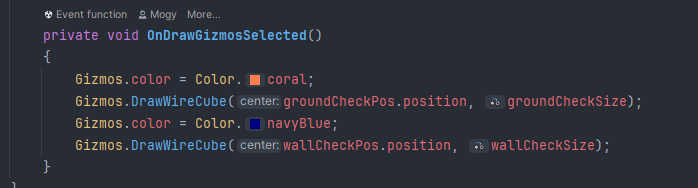
In a very similar fashion to the groundCheck, there is also a wallCheck for the player which is only on the side of the player that is facing forward which is also why the flip() function was so needed. The wallCheck checks if it is colliding with a wall on the wall layer and then tells the player to grab the wall and then the player can jump off of it or can slide off of it. Another thing I haven’t mentioned is that for debugging issues I had to apply 0 friction onto the player otherwise they would begin sticking to the wall with no way of moving.
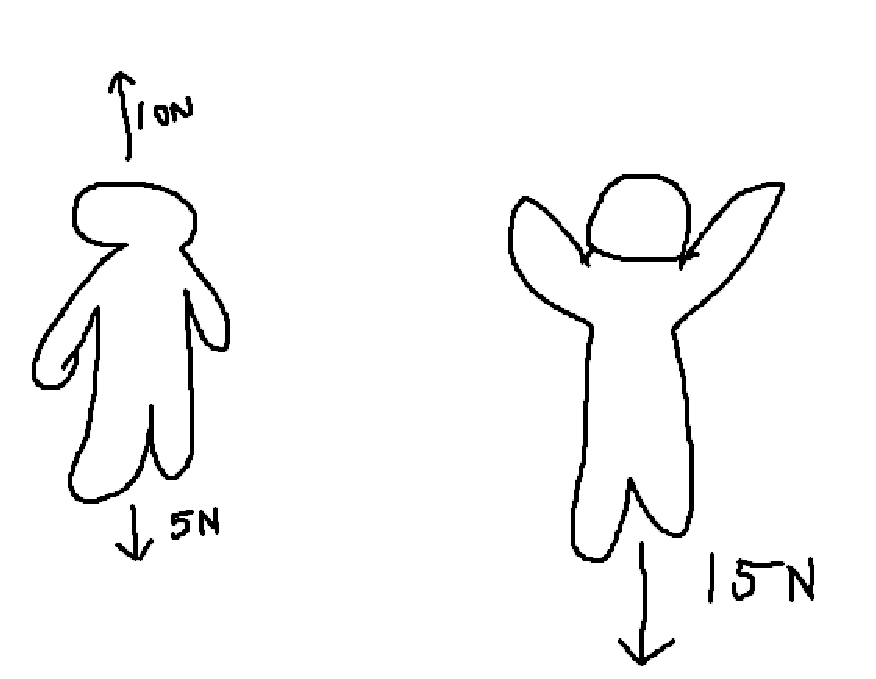
For more movement I also began playing around with some custom gravity settings to allow the player to fall at a quicker rate, simulating real life jumping where if you jump 10N in the air, there is 5N dragging you down, which means that when falling, there is roughly 15N pulling you back down to the ground. Numbers are purely theoretical and used for this example and not real.
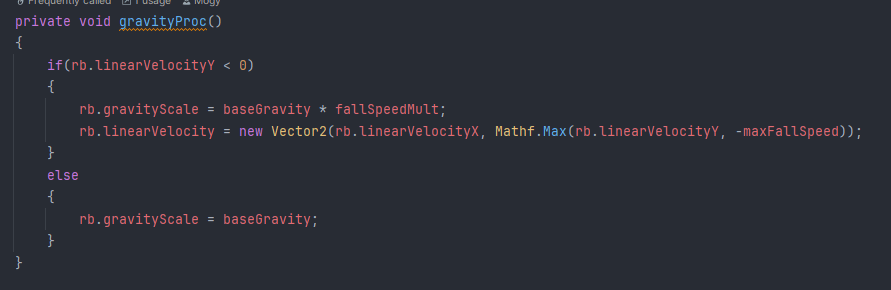
This function calculates custom new falling speed for the player based on additional gravitational pull and the weight of the player.
Spritework part 2
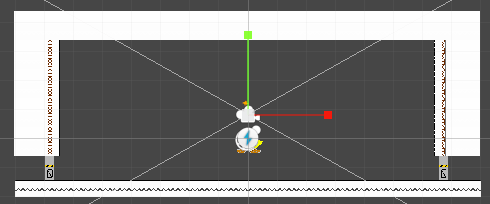
My initial sprites were mainly white and I really didn’t like how they looked against everything else so I made them based on black and they looked so much better as well as adding extra walls which more detail for environmental art.
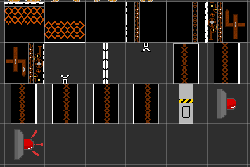
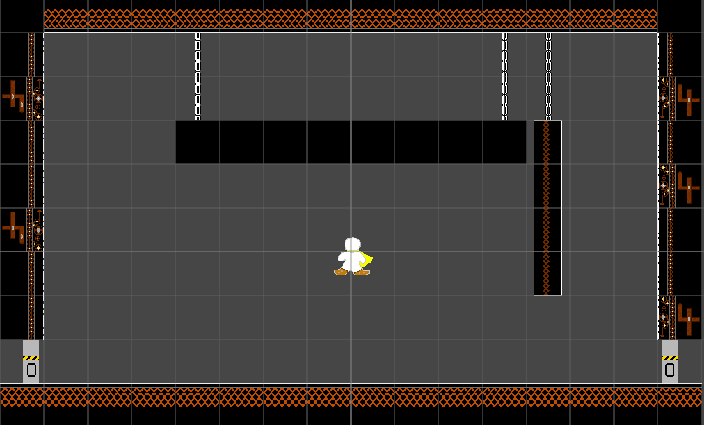
“Room_SideL”, the first room made before I remember about platforms.
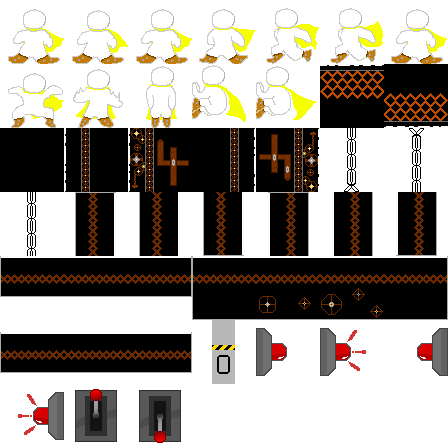
This was the final edition of the spritesheet which I had made sure carried all possible things that I need for making all of the different rooms.
This was also around the same time where I played around and added animations.


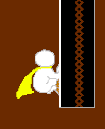
Wallcling
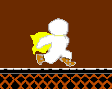
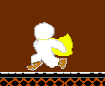
Running!
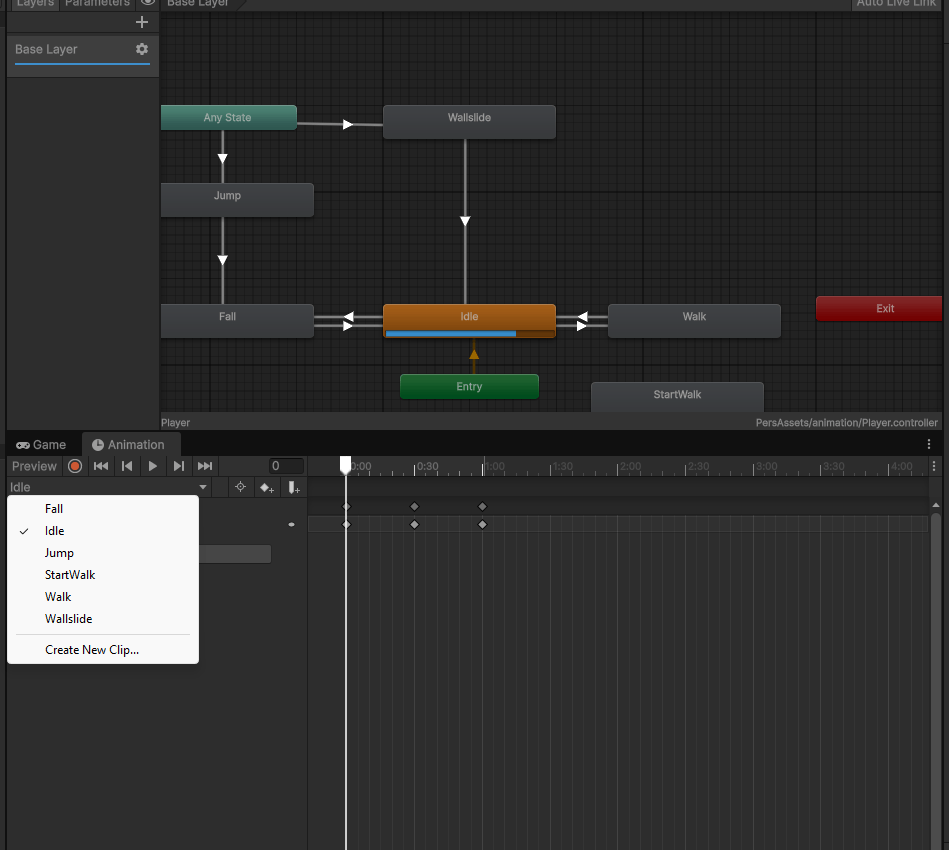
This is what the animator + animation panel looks like and a show into the different animations that the player has.
Room Design
In terms of Room Design, I decided to make my job very easy and is primarily one of the main reasons as to why I chose Unity Engine for my project: Pre-Fabs. Pre-Frabricated objects are objects collections that are set which you can create in your hierarchy and then save them in your files to use for later. I made the very core of every single room, my BaseRoom prefab
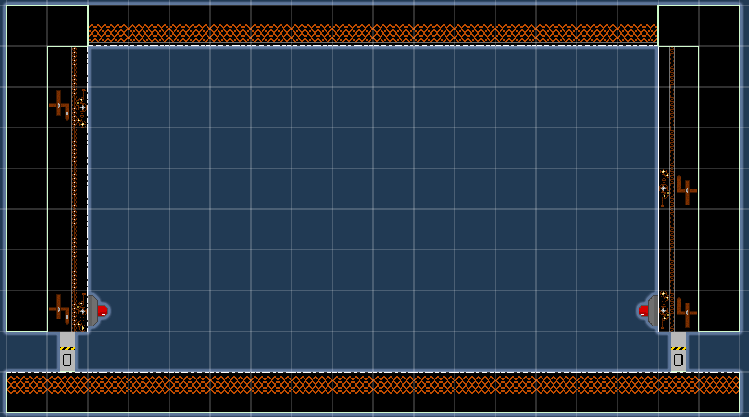
it is an 18×10 and it allows for different ideas for platforming puzzles and ways to get around different rooms. Technically another solution for even more rooms is reversing all of the rooms and identifying them as different, however, I have not done that.
BaseRoomLong: Scrapped
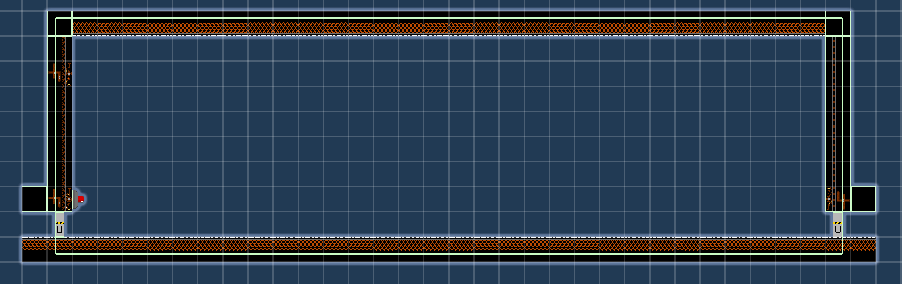
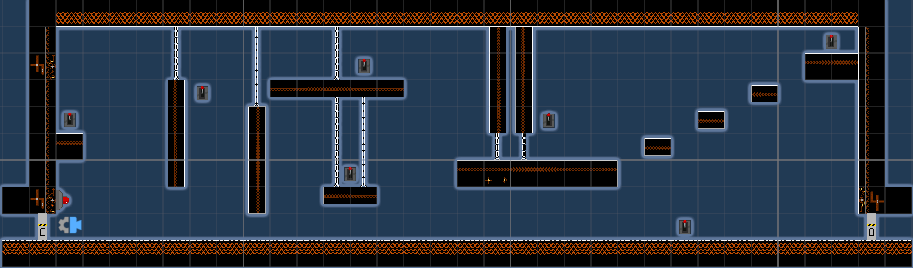
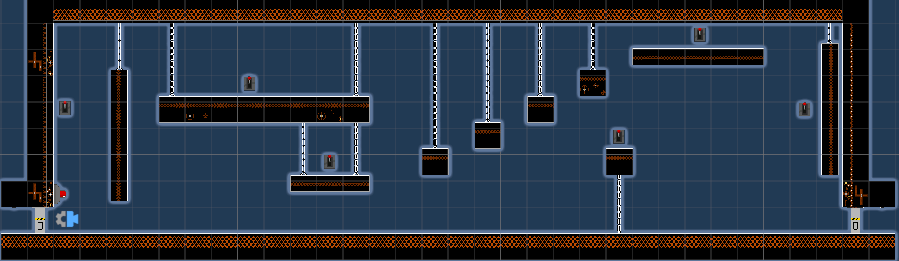
Long rooms where an idea that I had taken inspiration from The Binding of Isaac:Rebirth which had larger room variants where I thought that I could make however these proved very hard to include into my game as whenever I would try to instantiate them in my Room generation code, they had always messed up the sequence.
Room Variants
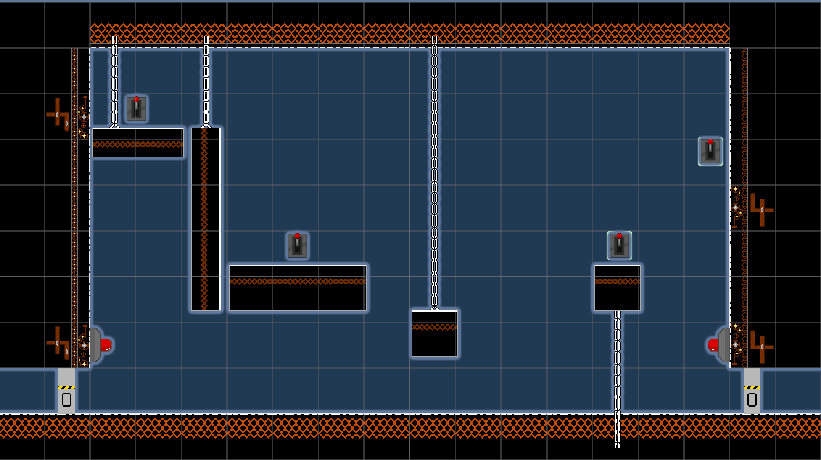
“Room_L”
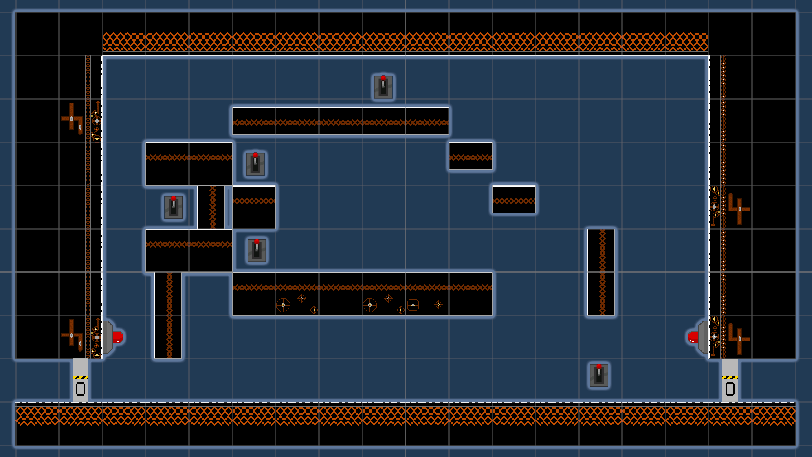
“Room_Mantis”
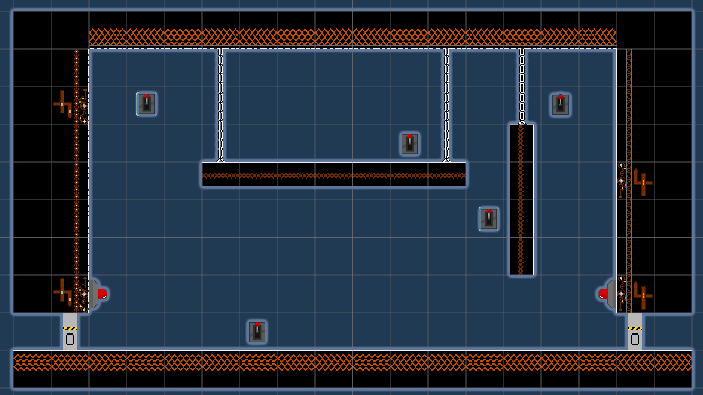
“Room_SideL”
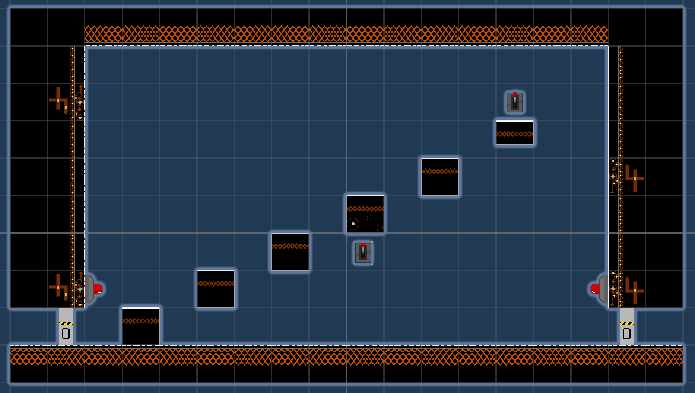
“Room_Steps”
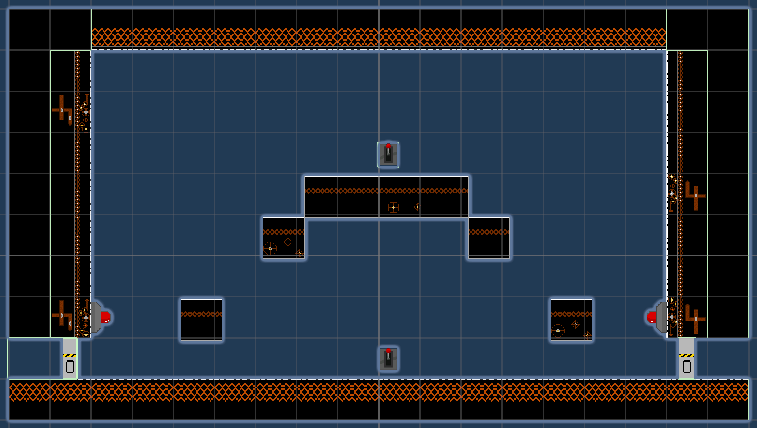
“Room_StepSteps”
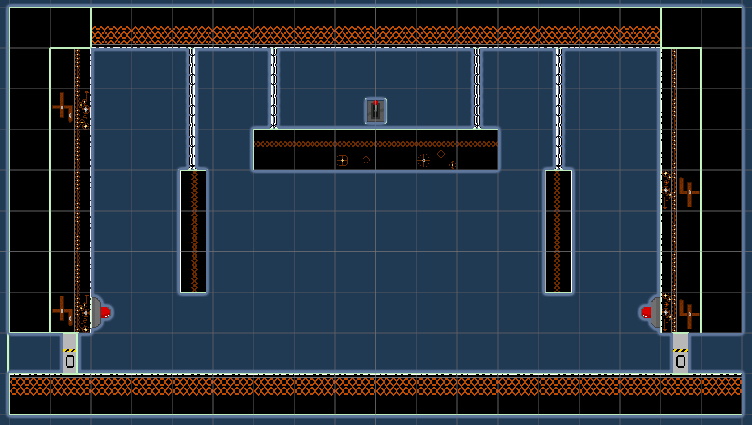
“Room_tut” (this is the first room that will be shown at all times, tutorial room)
All of the names behind these pre-fabs are all somewhat either based around the idea of the room or just generally what the platforms are shaped after. The only exception to this rule being Room_Mantis which I had come up with the name as my friend was talking about Hollow Knight’s Mantis Village platforming sections and I just wrote down Mantis.
The reason as to why I had made little amount of rooms is because I was going to generate these over and over and over again which will be the main gameplay loop of the game.
Lever -> Door interaction
You will have noticed all of these Levers around the specific rooms, being that these are the collectibles that the player has to walk around and get to progress to the next room where they repeat it again. For this, I had to create an interface for Items where they must have a collect function which speaks to a Collector Script inside of the player which makes sure that the item is picked up with the player’s collision.
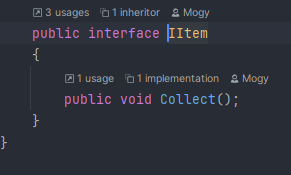
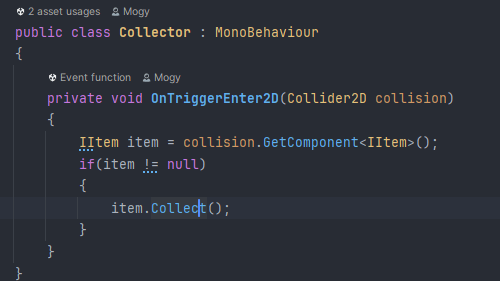
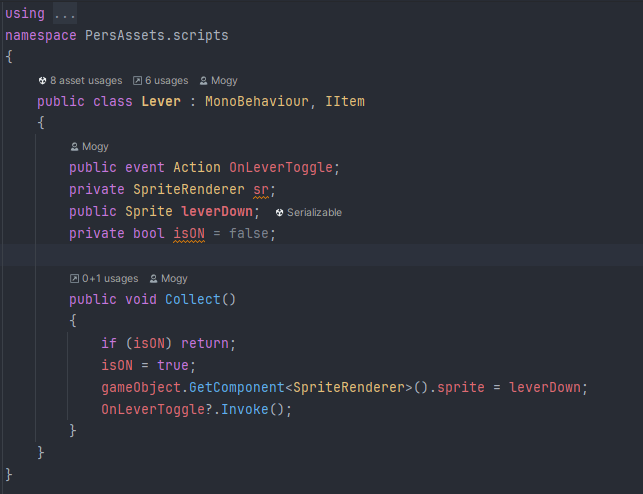
The lever script makes it so that when the player walks over the levers, their sprite gets changed to down version which shows that they have been flipped. The isON boolean makes sure that the specific lever’s collision box is gone so that the player cannot interact with it more than once. During production, I had a really weird problem where the lever was being interacted with 4 seperate times at once and with the implementation of the boolean, the number went down to 2. After several days of not touching the levers, the number went down to 1 due to unknown circumstances. Strange.
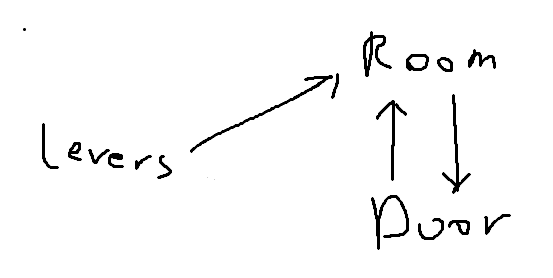
At first, I had it so that levers were held in a room’s hierarchy where they would speak to the room which the doors would also speak to the room and all communications was going everywhere and very quickly became very confusing to figure out how I was doing things so I revamped my entire system where the exitDoor only took a public array of levers (meaning I can set them specifically in Inspector) which then both would get sent to another script all held and personalised within each prefabs root named RoomManager which literally just did maths and would send out more signals based on amount of flipped levers that were connected to the door.
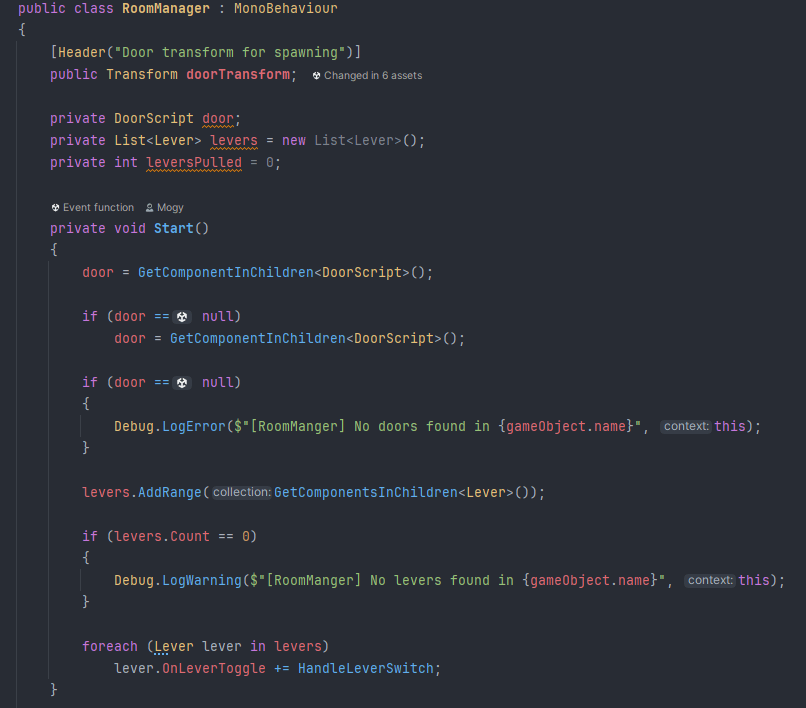
I was using the debug log warnings as a way of knowing what happens when just incase something went wrong, I could see what.
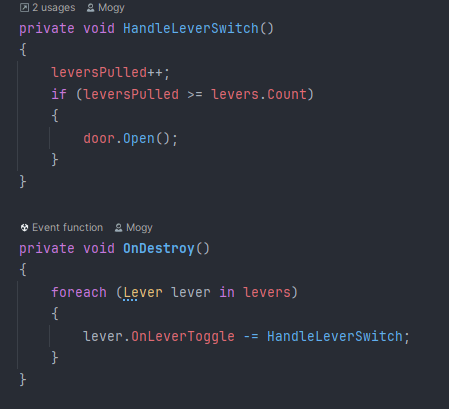
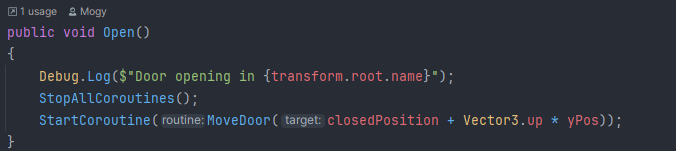
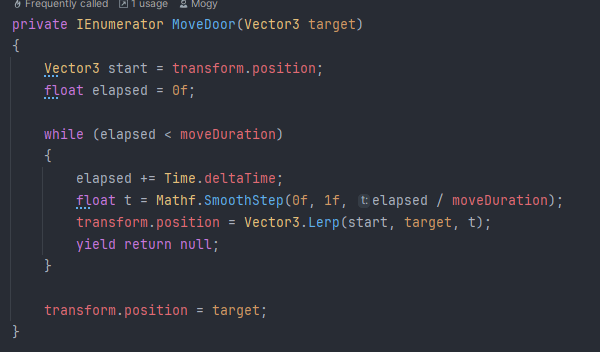
As a small cherry on top, I added an extra Coroutine which made the door go up very smoothly rather than almost disappearing.
The Entrance door to each of the rooms is activate via a BoxCollider Triggering the door to move down and whenever the player is not in the trigger, it moves back down again which i had a lot of fun figuring it out.
Its incredibly simple,
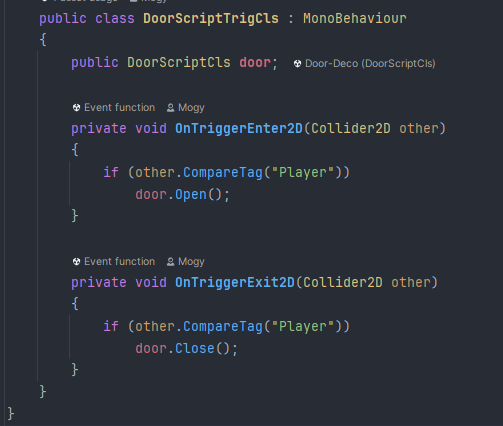
A door trigger script that then talks to the actual door itself which has an Open and Close function which do their own things just in an inverse so that it can open and close up and down.
Room Generation
Room generation took me very long to figure out and I had to get a little bit of help from my personal friends too.
The biggest problem about the actual room generation was figuring out where they needed to spawn. I wanted to base it off of the end of a room by its exit door + 2 so that it would allow for the use case of the long rooms as they were previously mentioned, however for some reason the way that the rooms were actually being generated ended up that whenever a long room would spawn, halfway through the long room, another regular room would spawn inside of it.
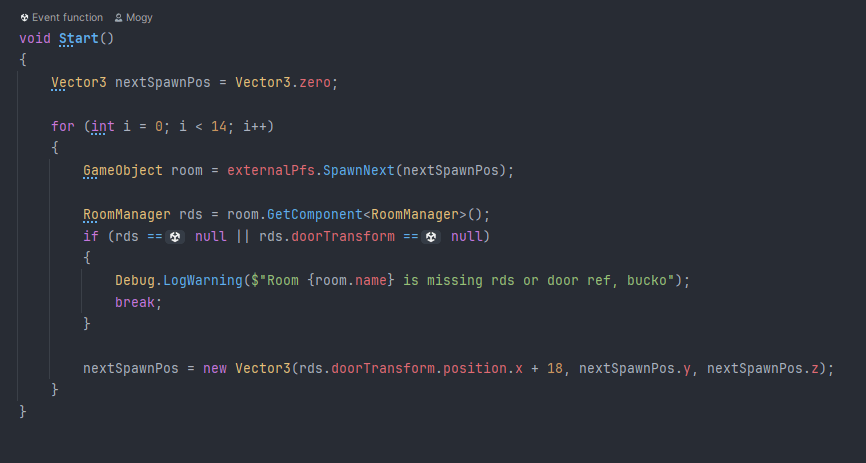
this is a Fisher-Yates shuffle, it is the most common type of shuffle in mathematics and is very easy to do, finding a solution to it on Stack Overflow, this takes an array of rooms and fills out a list and shuffles them as it does so, which then it goes into another script which spawns them. Here I have them set their spawn at the last placed door which does work, just not for long rooms for some reason.

This is room generation of 14 which is the current amount of rooms being generated each time.

This is 19 rooms generated which used to be the old amount of rooms generated however I though that this would be too much for the player to run through at once and would get really boring.
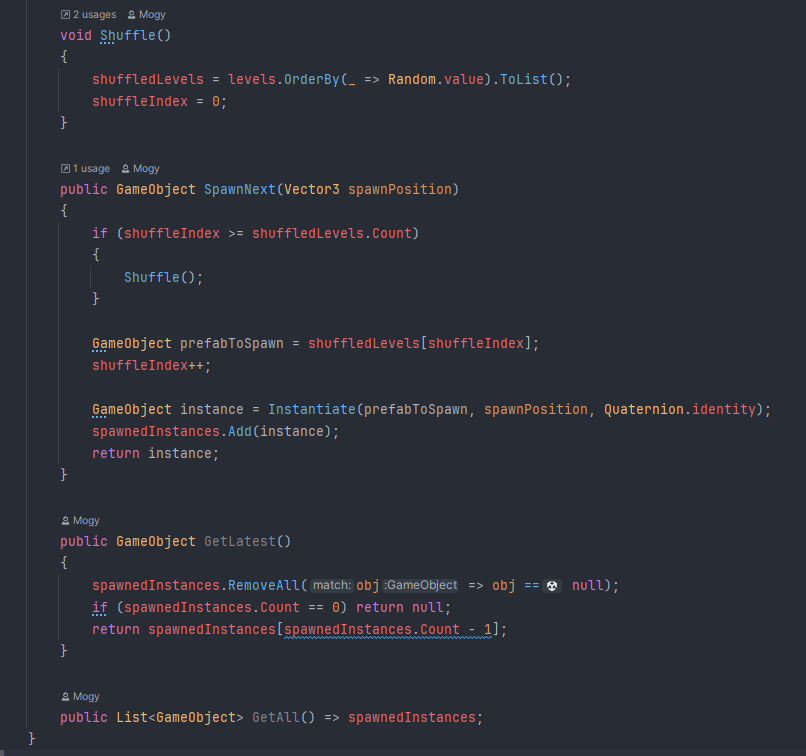
This is the external script which takes the list of rooms and spawns them at the set spawnposition of “rds.door.position.x + 18” the reason why it is +18 is because the door is set at whatever is 0,0 of the room meaning that without the + 18 rooms would be spawning inside of eachother midway through eachother.
The doors and the room generation is about 70-80% of the entire game which was the biggest things for me to make as they were very confusing and challenging.
Scene Changes
Scene changes were another very important thing, I wanted the Elevator / Rest Points to be another scene for the UI implementation of the upgrade menu which I found out very quick how to do.
Elevator
I wanted the change between the elevator and the main scene to be nice and smooth, so I looked into adding a transition between my scenes, a simple fade in and fade out and this is what I found:
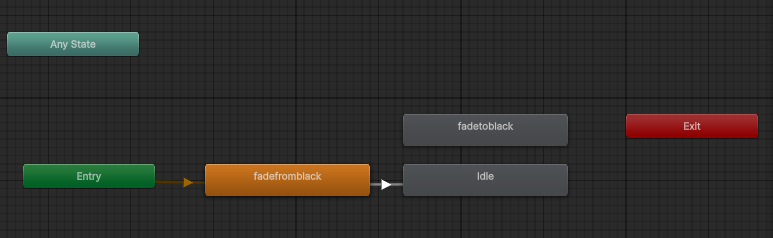
a 40 frame change from Alpha 0 to Alpha 255 on a black screen.
Another thing about my scenes is that I can set a specific transform on a scene which is where the player will appear which I think is very good and useful as i have set start positions for the players on all of my scenes
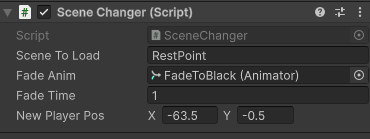
this script also allows the fade time to be slower, allowing for more time as a loading screen.
Here is the result!
Main Menu
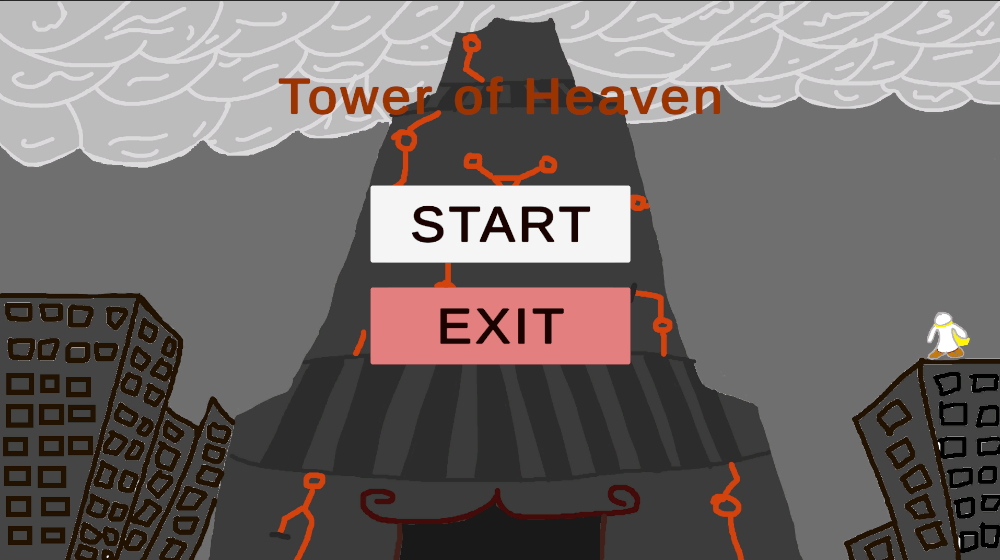
The main menu is structured very similarly to the elevator where there is the Main Menu itself as a UI with buttons and a very similar copy of the scene transition script where I only took the part about spawning the player at a specific position which I needed for the START button. I also took my time to quickly draw up a Main Menu image which I thought looked very good for the style that I wanted.
I included the protagonist of the game, John Tower in the main menu screen as an extra point of style as well as showing the tower that the game is set in anyway, reaching all the way to the skies.
Shop / Upgrade System
The upgrade system works in the way that the character just kind of finds items on the ground that they can use to improve themselves, each item is individual with their own little descriptions and possibly little lore pieces these buffs are then applied to the player
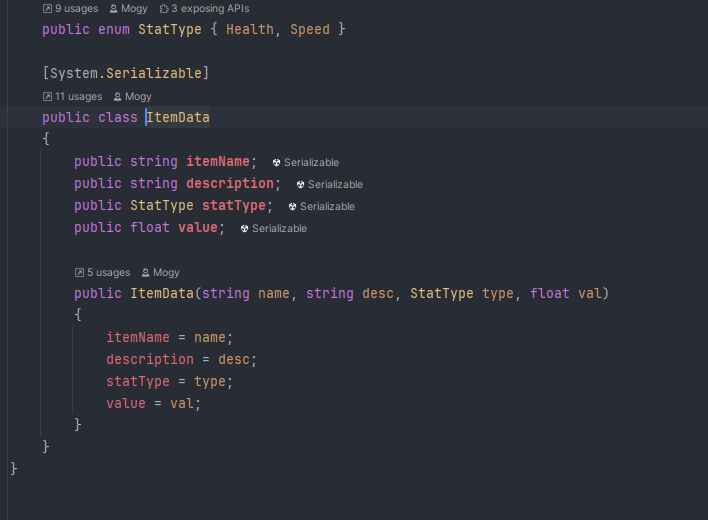
This is the Enum that applies different types of items the attributes they all must have and how they are used when applying their variables to them.
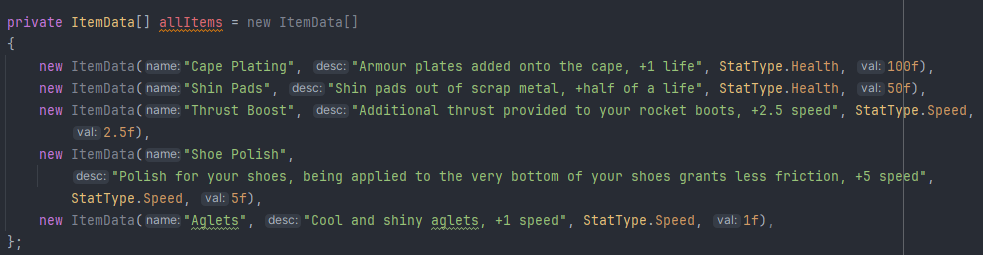
This is the logic that I can add more items to which I add their custom name, item description, which value they speak to and how much they raise it by.
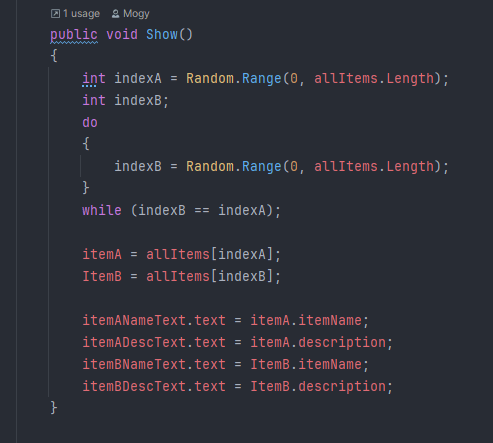
2 of these items are then picked out and set as ItemA and ItemB which then display as their name and description on the button and under it, as is set in the UI Canvas.
This is where the upgrade is, the background is actually the same filler blocks that are used for the black squares between each of the rooms in the main section of the game.
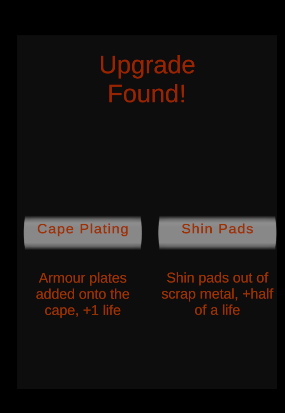
This is the script running, 2 buttons, descriptions and what they do, and they get applied to the player which then closes down the UI and opens up the door out to lead into what is a new corridor.
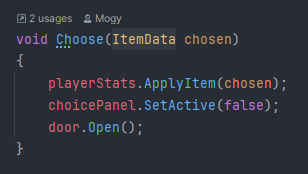
door.Open(); is the same door movement as the main game doors when the levers are flipped. A smart reuse of code.
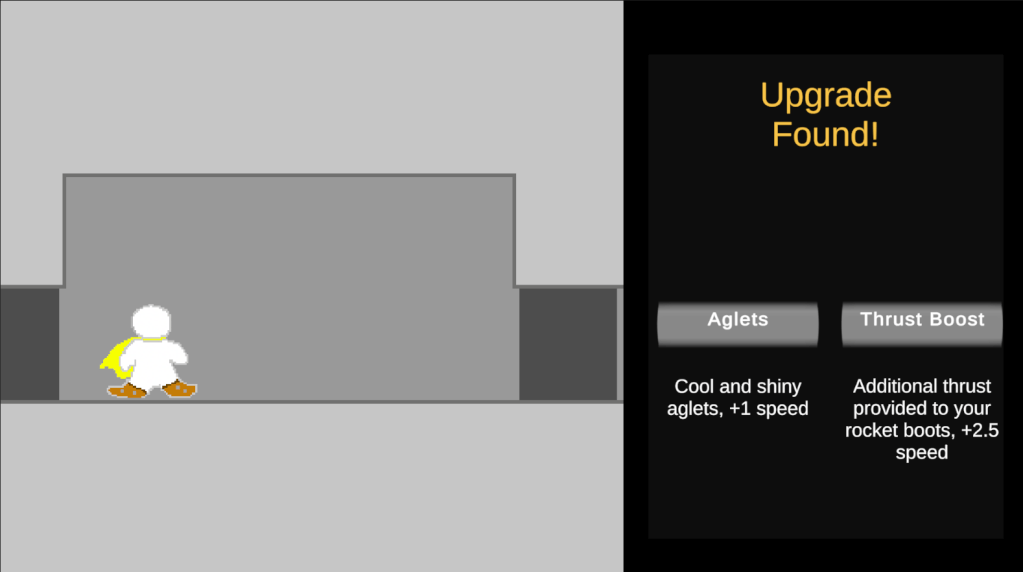
An older screenshot from when the UI first started running.
Enemy and death
I started running out of time here on the FMP so I had to quickly improvise with a quick sprite draw as I had forgotten to draw the enemy sprites and wouldn’t have time to do any of the other previously planned out enemies, just the first one. G.I.Dragon.

Temporary sprite, there for it to work, to be remade at some point.
This enemy is one which flies, and dashes at the player after getting the position of the player and drawing a straight line and dashing through that line. The player just has to stay out of it. This enemy works on 2 entire scripts, its main brain and its trajectory Line Telegraph.
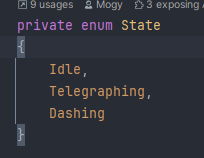
First, the dragon is assigned its different states, Idle, Telegraphing and Dashing. At the beginning it has its state set as Idle and is then going through different stages of its lifespan – Idle, Telegraphing and Dashing in that order through this switch struct
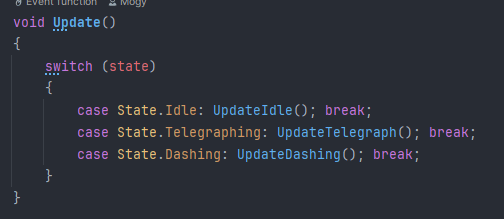
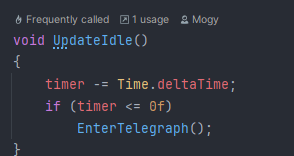
There is a specific timer on how long the idle is for the dragon, only being 2 seconds afterwhich it enters into Telegraphing mode which gets the player’s position and subtracts it by its own to know where it needs to dash, it then draws a line for a certain amount of time and proceeds to go forth and dash to try and kill the player.
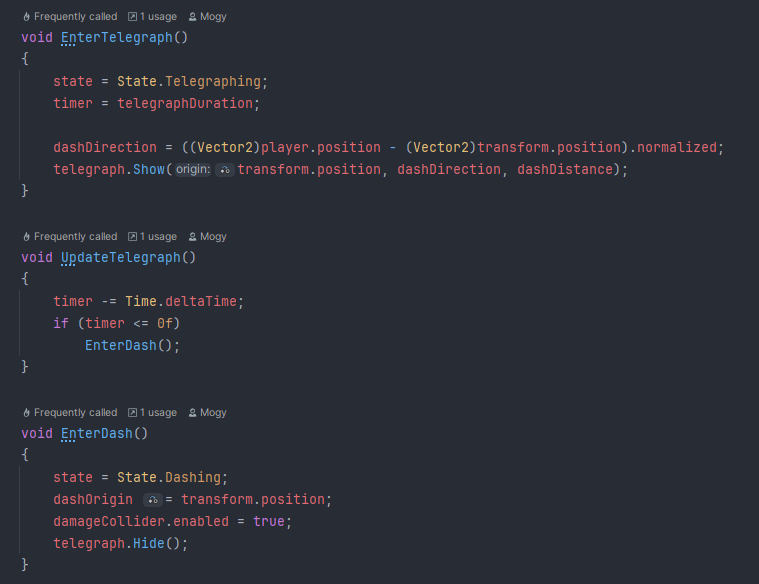
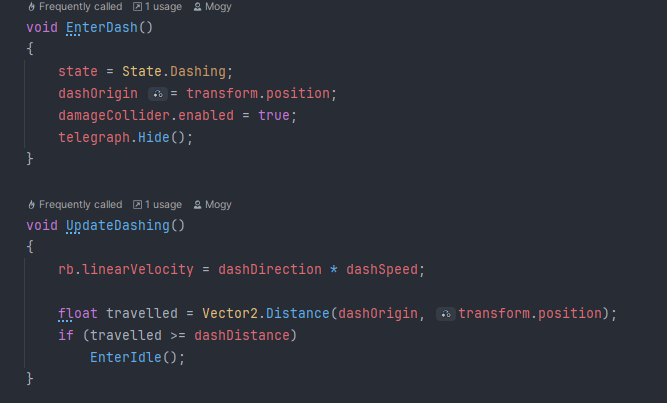
Here, it enters the dashing state as it updates itself with its own movement script and how far it goes and at what speed, after all of that is done, it enters back into idle, only for the cycle to repeat.
Death
On Collision with the player, the dragon will deal 100 damage which will usually be a one shot unless the player has grabbed an item which makes them have extra health so that they can survive that type of hit.
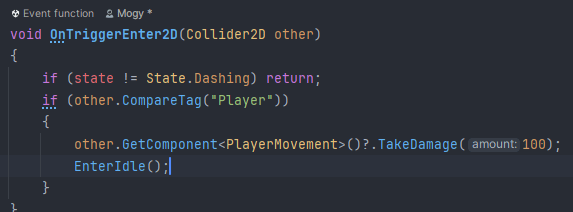
The EnterIdle(); at the very end makes it so that if it hits the player it actually stops exactly where it is and enters Idle again which could be very interesting for interactions.
Music
For my musical composition I did not have enough time to produce the music using Soundtrap so I got my royalty-free music from https://www.incompetech.com/ and they had some really good music that I think fit really really well.
I can’t upload the mp3s onto here but
In a Heartbeat – The main song for the platformer game.
Floating Cities – The main theme for the Rest Points
Simplex – The main menu theme for the game.

