
Plan
For my 3D model, I have decided to create a weapon object in the 3D Modelling software, Blender.
When this was first assigned, I had some ideas for the 3D model from objects that I have previously drawn.
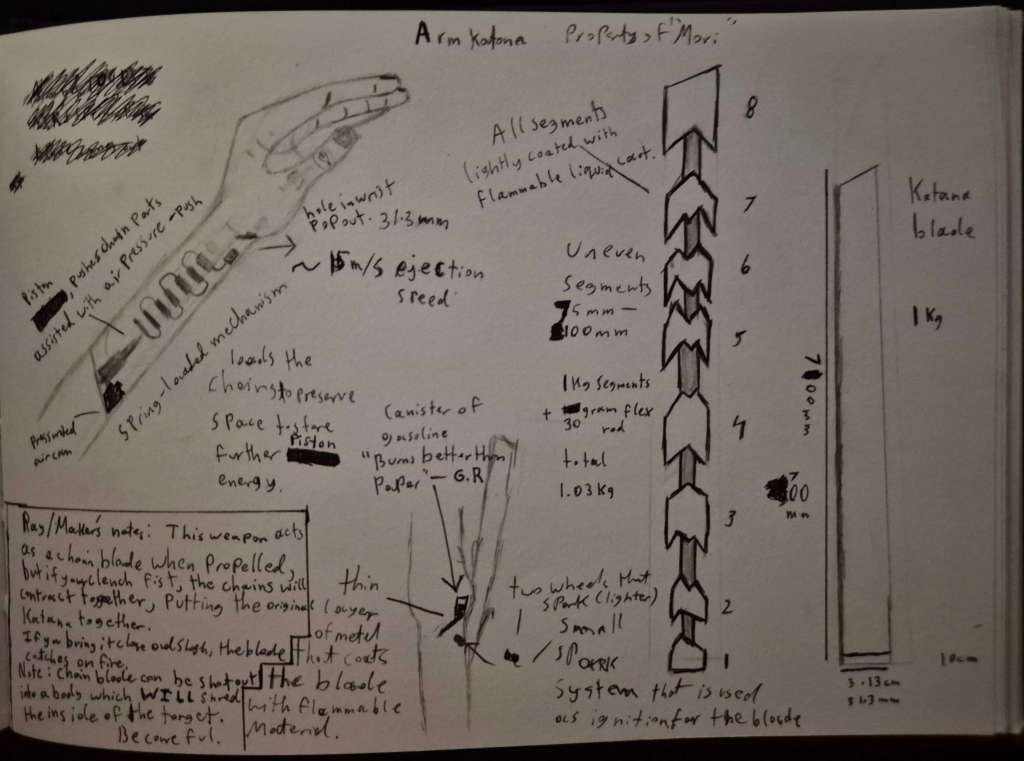
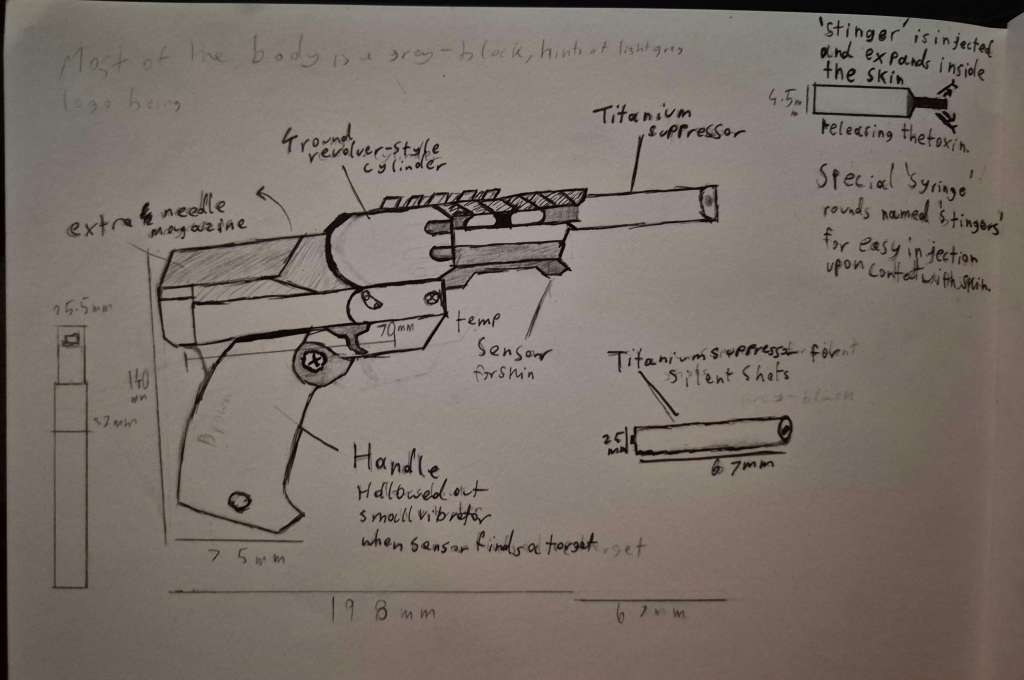
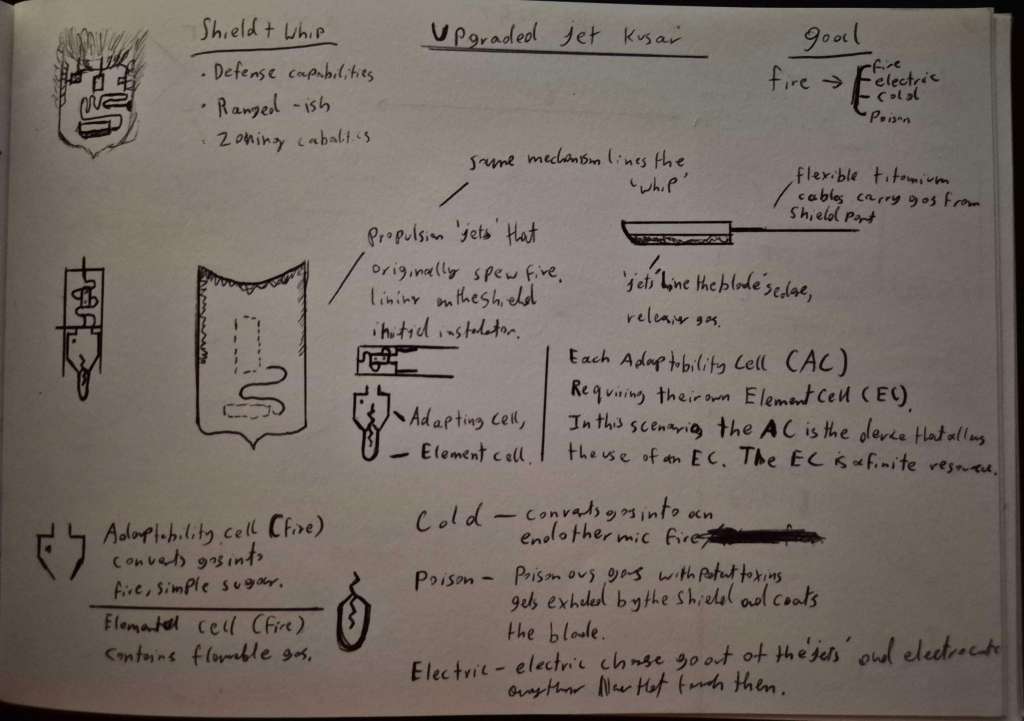
These are all items that I have drawn in my own free and personal time as well as analysed them based on real metrics and measurements of historically accurate weapon foundations.
For example, in the first image, I have researched appropriate historically accurate Japanese long sword weights and measurements, this also influenced the mechanism used to propel the blade out of the robotic arm.
This is also shown in the second image where I researched into general measurements and blueprints of a Glock-17 chassis which I used for the foundations and then added a sci-fi fantasy flare.
After considerations on other objects from video game media that I could recreate, I have decided to attempt to recreate the Hope Great sword from Monster Hunter Wilds. I chose this because I thought that the design would be simple enough to recreate without causing too many issues but also complicated enough so that I would give myself a challenge with the creation of it.
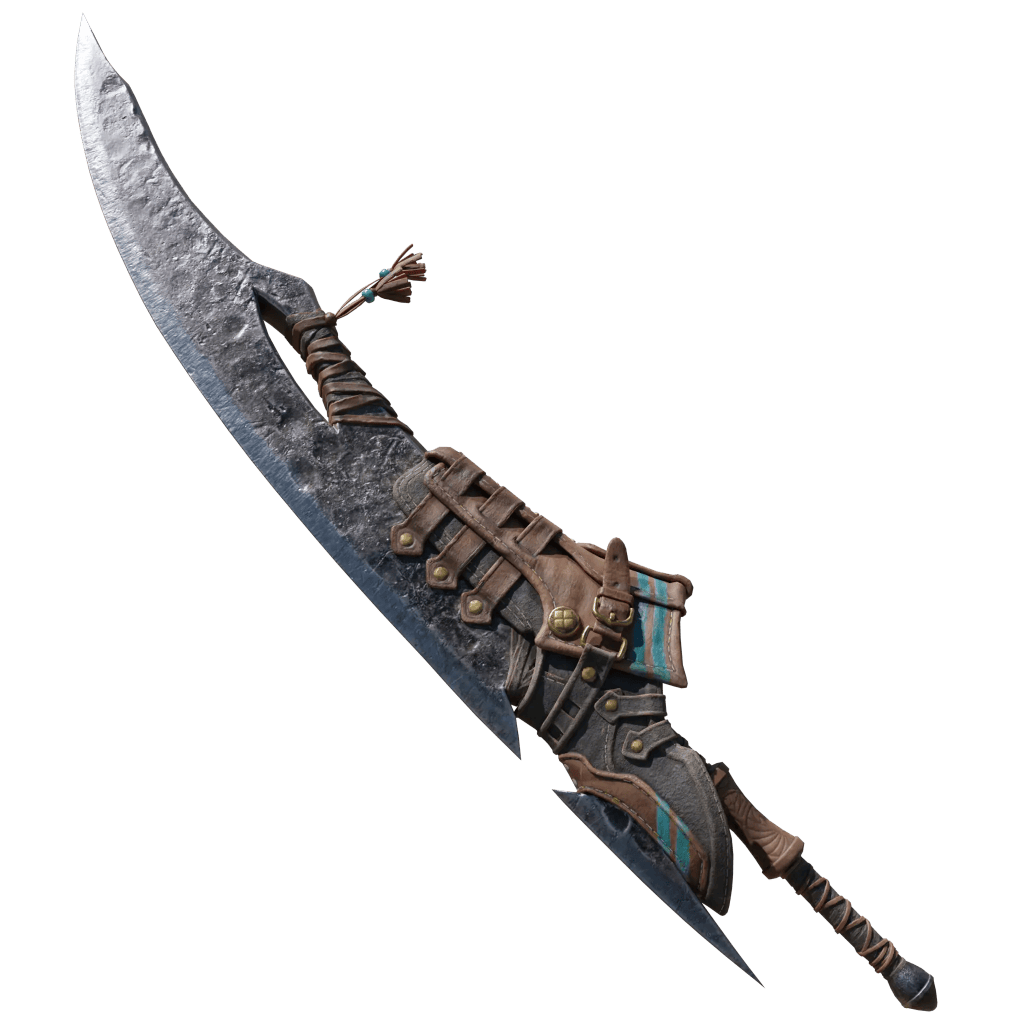
I first decided to break down the object into basic colours that make it up as well as annotate which colours belong to which part of the weapon. This is important as it helps when coming to texturing the object.
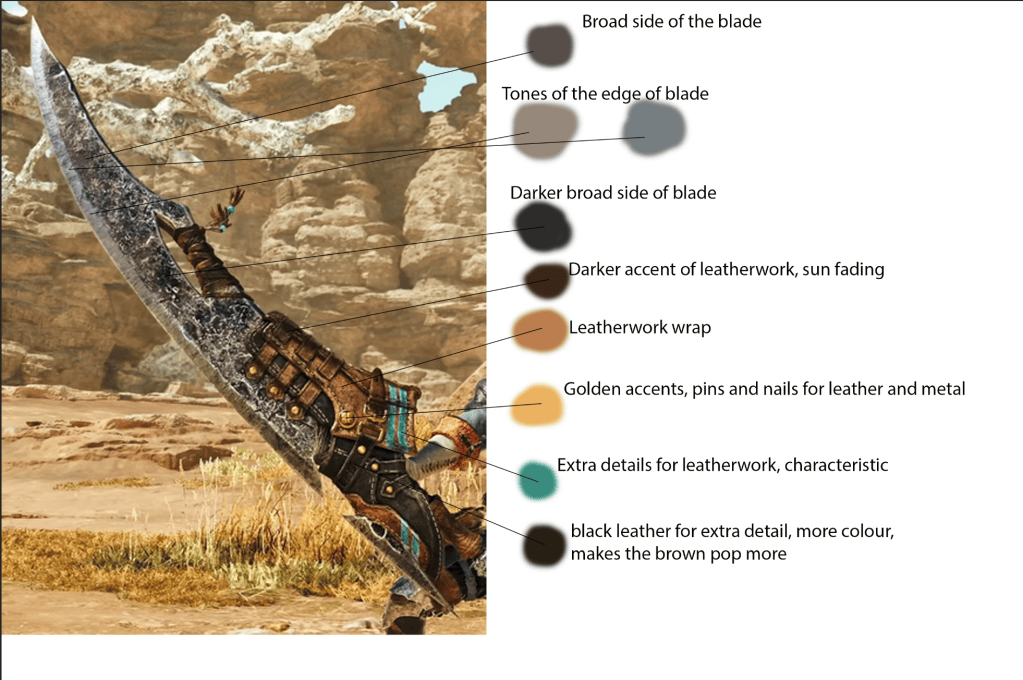
Research: Hope Great Sword
Generally, the great sword is a very bulky weapon, its big, its heavy and it is made of solid metal, realistically, the main way that this weapon would be doing any damage is through momentum, the weight is estimated to be nearly 100kg because blacksmiths “MAN AT ARMS” decided to make Cloud’s Buster Sword (https://www.youtube.com/watch?v=xogheZdAO18) out of aluminium which in itself weighed at about 35kg, on the assumption that the great sword is made of straight metal and no alloys, iron would weigh roughly 3 or 4 times more than the aluminium, meaning the great sword would weigh to about 100kg. This means that a human has to be able to lift 100kg confidently and regularly for multiple minutes at a time, swinging it around. To put the weight of the great sword into perspective, the current world record in just lifting weights is about 200kg as of 2021. The average lifting amount in the UK for men is 25kg so that means that every player character in the Monster hunter franchise is almost 4 to 6 times strong than the average person from the UK. This isn’t even considering the fact of the handle being extremely small and hard to hold onto with the hulking chunk of metal on the front of the stick. The way that the Hunter holds the great sword means that they are lifting around 90-100kg purely on their wrists which from an outside perspective would absolutely shatter any wrists, even with conditioned wrists I imagine it would be very difficult.
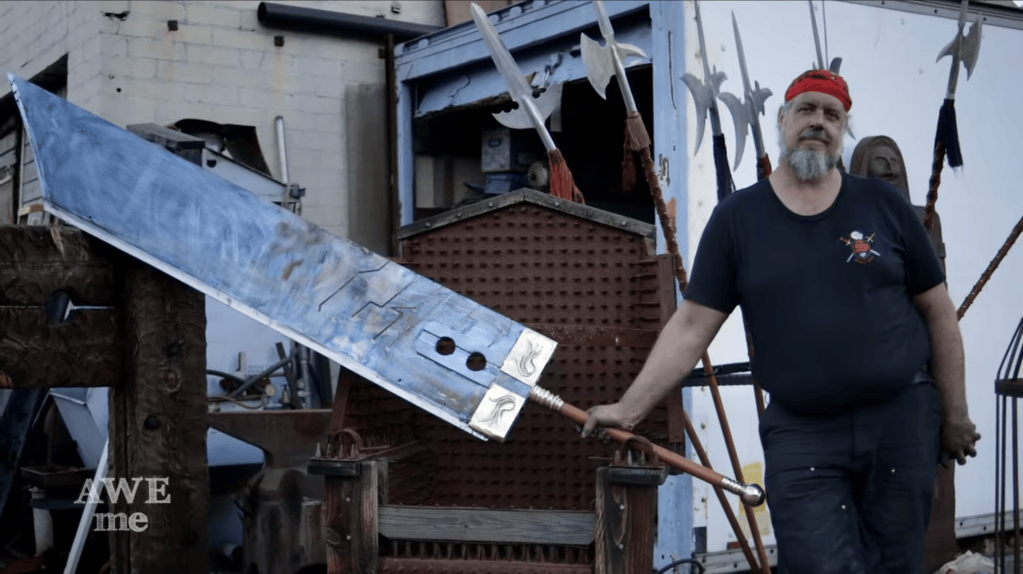
This is a screenshot showing off MAN AT ARMS with the buster sword, with the person in the image saying “Im a pretty strong guy but taking this thing out of the workshop pretty much wrecked my arm, shoulders and back.” They also said that even with it all being made out of aluminium it weighted 75-80lbs (which is roughly 35kg)
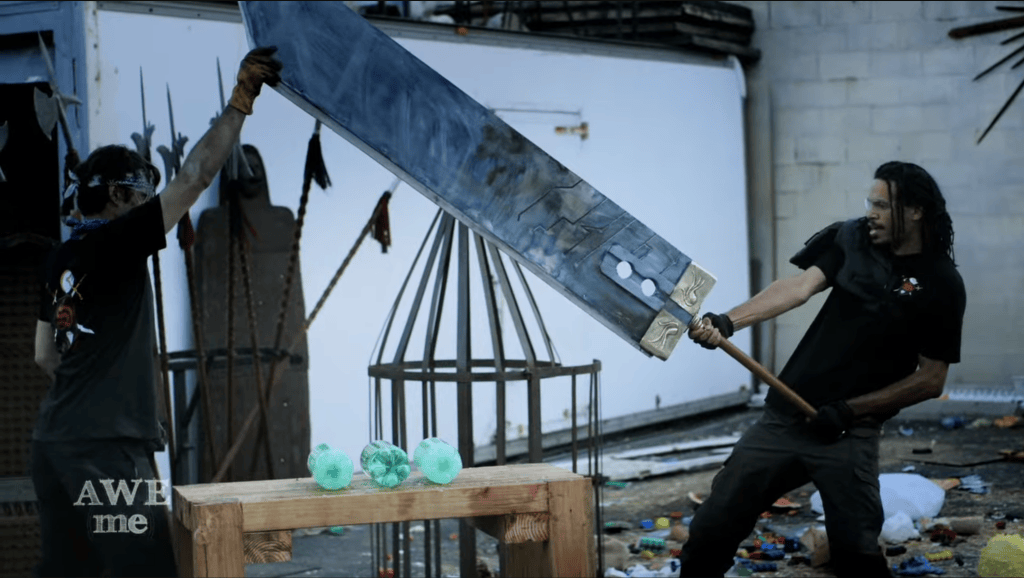
This screenshot shows the guy holding the greatsword by the handle and not being able to hold it properly, needing someone else to hold it up on the other side.
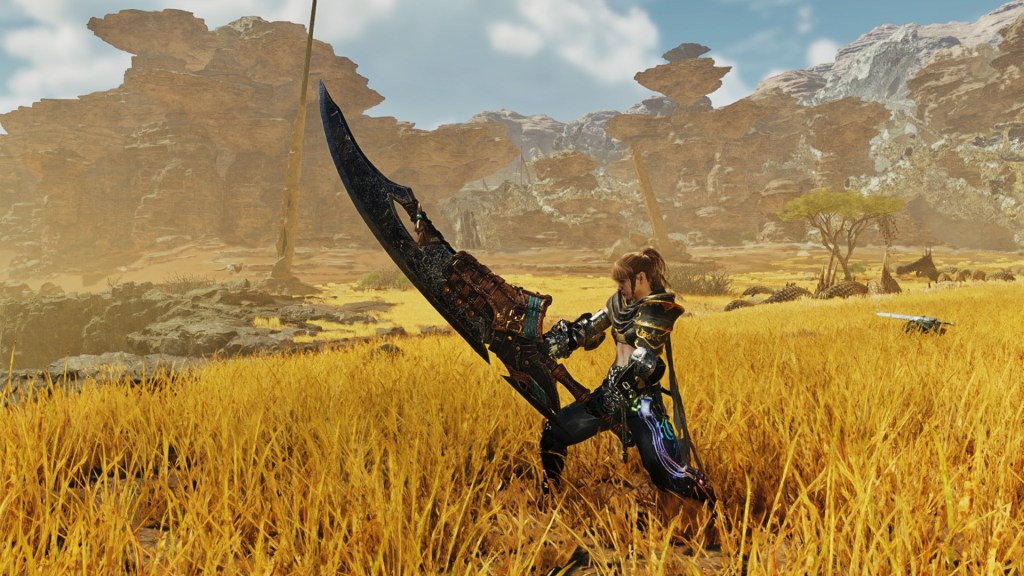
In this screenshot I took by going into the game, it shows the hunter holding the great sword in the same way that the guy was holding it previously. Notice how even with the wide stance on the legs, the arms, wrists and the back are being put into a lot of strain by holding up the great sword by the handle that is realistically too small for the amount of weight being at the end of the sword.
In analysis of the move set of the great sword, the real life applications of this weapon are very impractical if it ever came to using it against actual people, the weapon swings very stiffly and the move set has the hunter struggling to pick it up, leaving the wielder open to any attack for people to take advantage of. Even just the fact that it shows the hunter stumbling around trying to keep it steady and fall to either side is enough of a tell that this weapon is simply just too
Historically, Great Sword wielders would slash their great sword forward (or even use a thrust attack) into a “reset” manoeuvre where they swing their great sword around their head in a continuous motion to maximize the gain of momentum on their following attacks and to minimize the loss of momentum in any of their swings as possible, this was a tactic used in a lot of man-on-man wars, where soldiers would fight other soldiers, built like them and hold similar capabilities. The great sword in the game breaks a lot of these historical rules and while keeping its own laws of physics to reiterate the point to the player that the weapon is heavily advised against use of it in any human-on-human war.
The developers have decided to take very creative liberties seeing as the game instead of fighting big, threatening monsters instead of other humans. With these creative liberties in place, the developers gave themselves a lot of fictional breathing room so that the great sword can have its own physics and in physical analysis, make it make sense but also be greatly divided to historically accurate war great swords, proving to the players that these cannot be used effectively in war between humans seeing as this game also contains a lot of messages about being anti-violence between humans. The creative liberties taken by the developers have the great sword be accurate in a physics sense where the game has the player use their own body’s motion to transfer their momentum to their blade using the law of conversation of energy, I think they did this as historically, great swords would weigh less than the person wielding it and therefore would use the wielder as a point of pivot, however in this case because the player’s weight is less than their weapon’s, what the developers did is they had the hunter slam down the blade, causing the player to throw themselves forward due to them weighing less than the sword, causing them to gain more motion again and build up momentum in air and hit the floor and from the moment they hit the ground they transfer all of the energy they got from the air-time they gained into more momentum into swinging the sword again with maximum force and power behind the strike.
This is what that looks like visually.
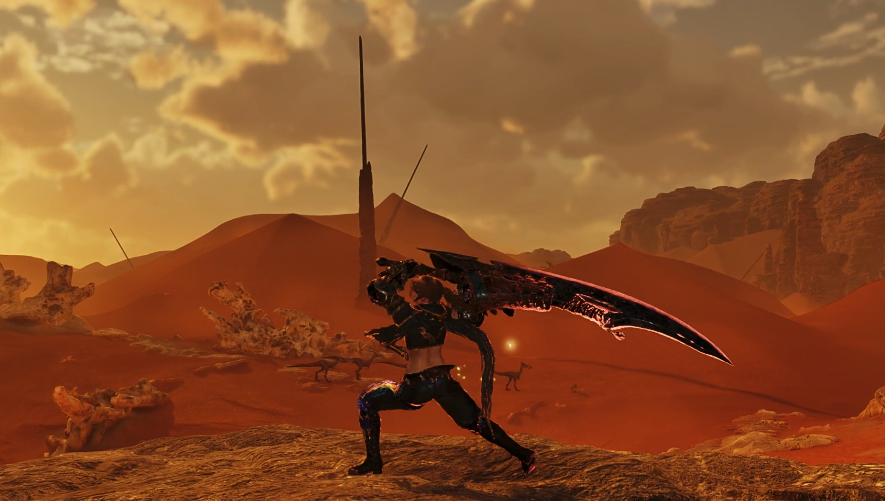
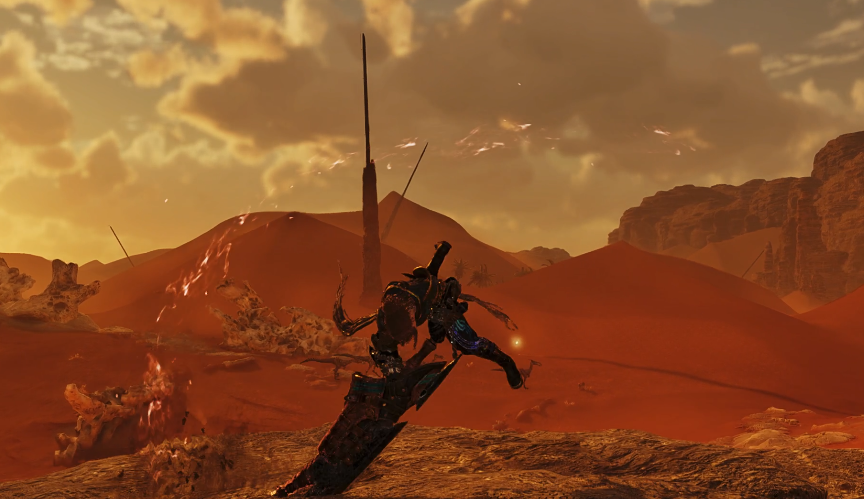
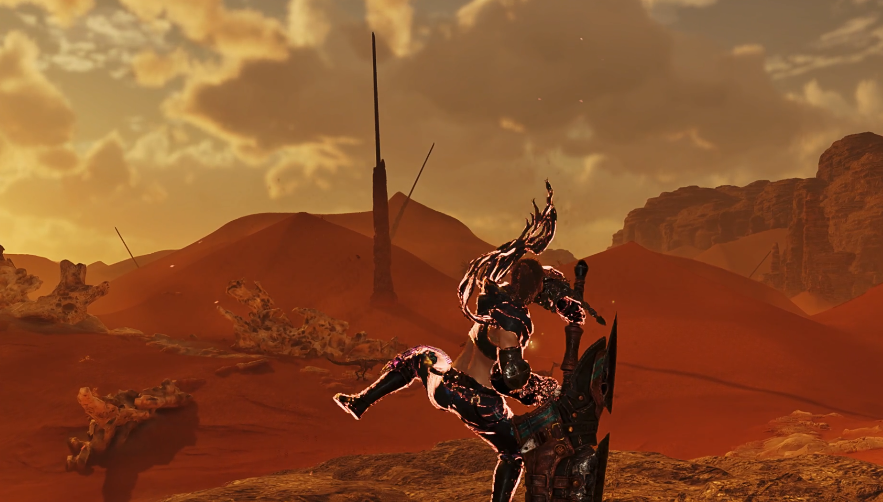
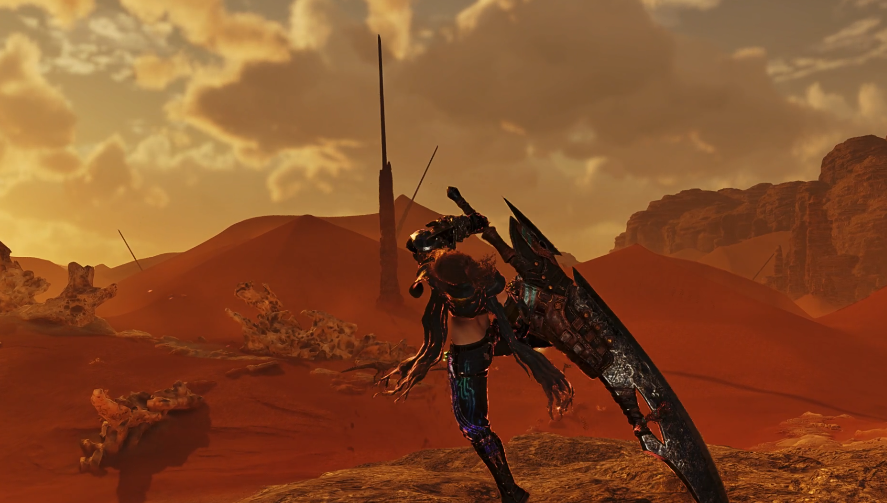
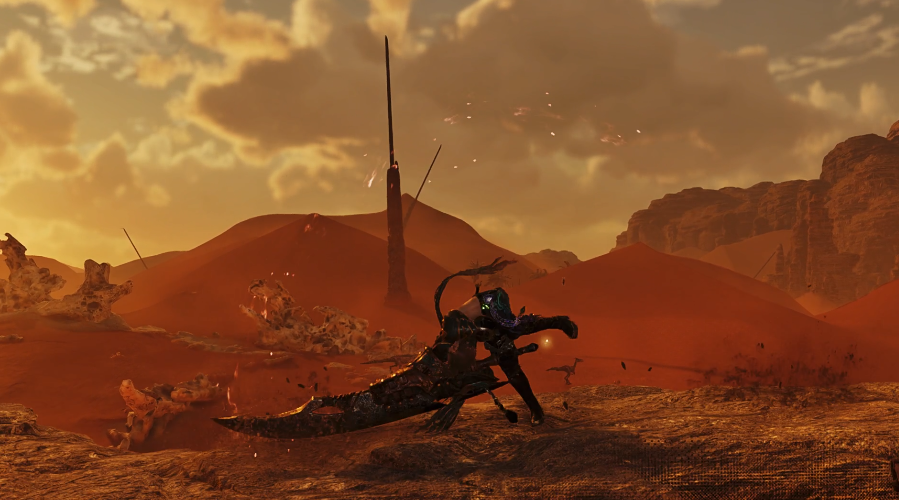
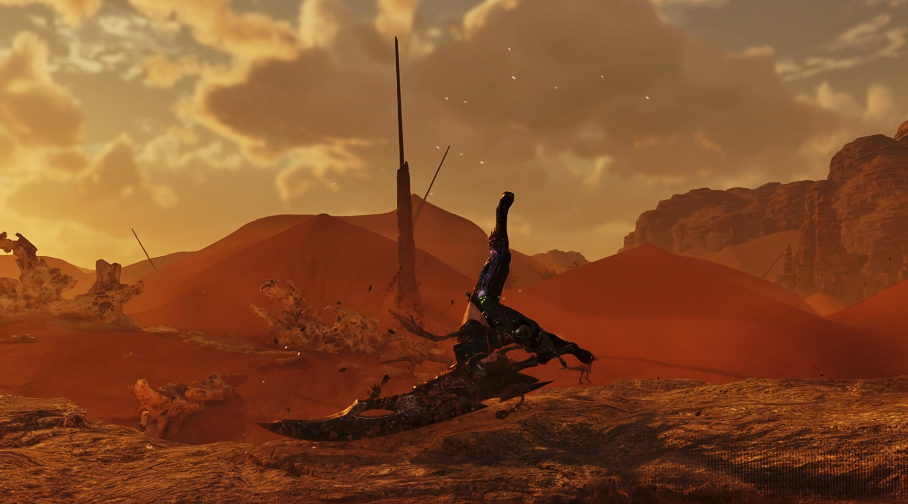
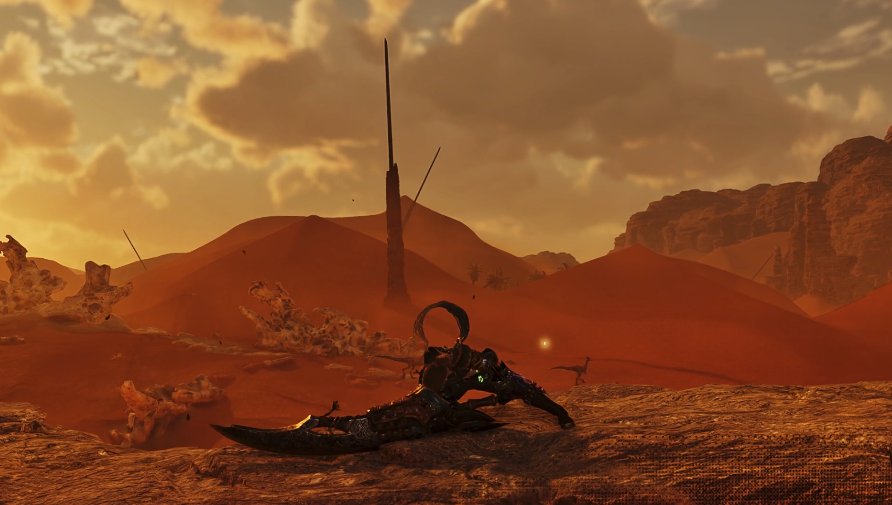
You can see how the developers wanted to emphasize that this weapon is extremely heavy and has a lot of physical weight on it by the last 2 pictures how the character is thrown forward with the blade as it comes down and how they have to pull themselves back down.
I believe that this is a great video that provides a lot of great insight into the historical practicalities of the sword and how it was used for combat: games tend to portray great swords as extremely big and heavy, and they were heavy, but not heavy that when put into realistic perspectives would shatter the user’s wrists. The Zweihander (as an example) uses a lot of momentum to swing, instead of brute sheer muscle strength which the great sword from monster hunter uses very sparingly, it notices the fact that the weapon is big and heavy and will have the player use at least a case of momentum, just in a very unconventional and non-realistic way. The developers however are fully aware of this and are just trying to limit test just how much they can break boundaries of reality when the player is fighting terrifying monsters that are at least 4 times bigger than the player on average.
Production
Great Sword Blade
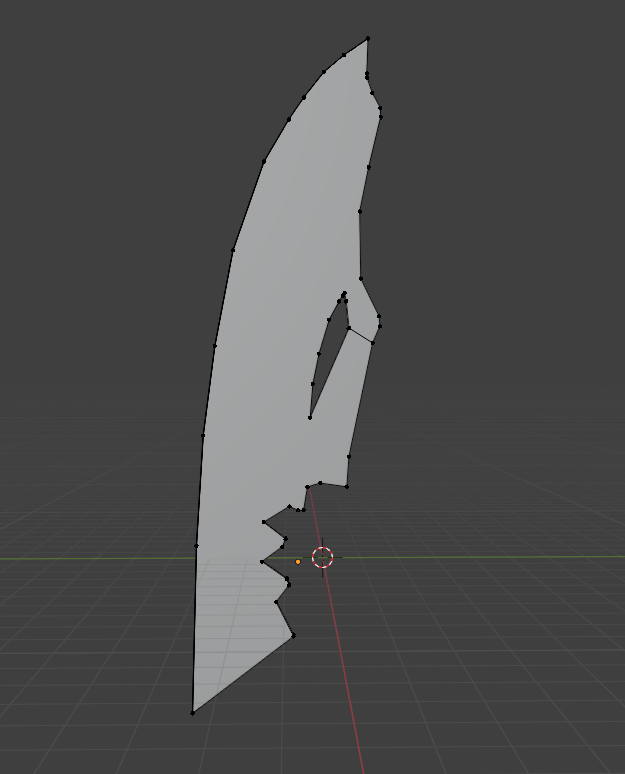
This was my first attempt at the blade, it took me realistically too long and was just one huge polygon where there was barely any topography and was just made of vertices. I have learnt from this first edition that utilising edges would be useful in shaping.
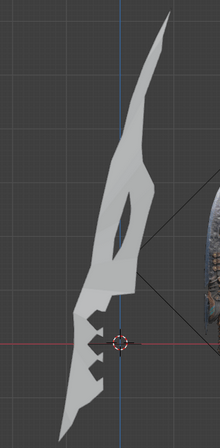
This was my second attempt at the blade. It started off very strong however I ended up extruding and scaling it too early in the development process that I could not undo it anymore. This caused the top to end up way to have way too sharp of a point and for the sharp end of the blade to be too far back for where it should be. During this version I learnt that the knife tool exists where I could make the hole in the sword and for the faces to not be affected. This version has also taught me to not extrude it too early, and to do it only when i believe it is done.
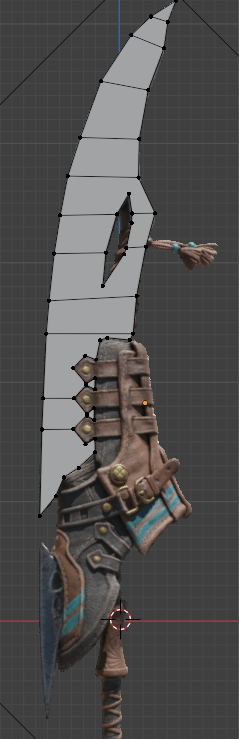
For my third and probably final version of the blade, I have learnt from my previous mistakes; using the knife tool, not extruding and scaling too early in the development and warping, to create a clean and properly-scaled edition of the blade. I will only be extruding this for the full model when I am confident that it will not warp itself.
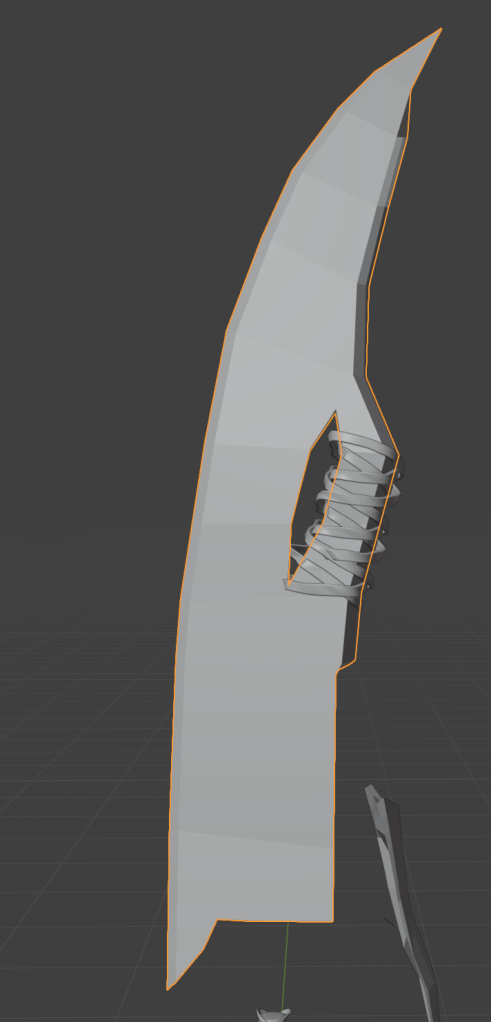
When it came down to making the main leather body, I had noticed that the blade itself was a block of metal, with the leather wrapped over it, the fact that this is modelled this way shows that the developers have thought about the realisitic implications of it a lot, as making the sword one big metal block and then just wrapping it in leather is the most efficient way if it came to actually crafting the sword itself. Therefore I grabbed and moved down the bits that were shaped around the leather when referenecing a flat image.
Wraps
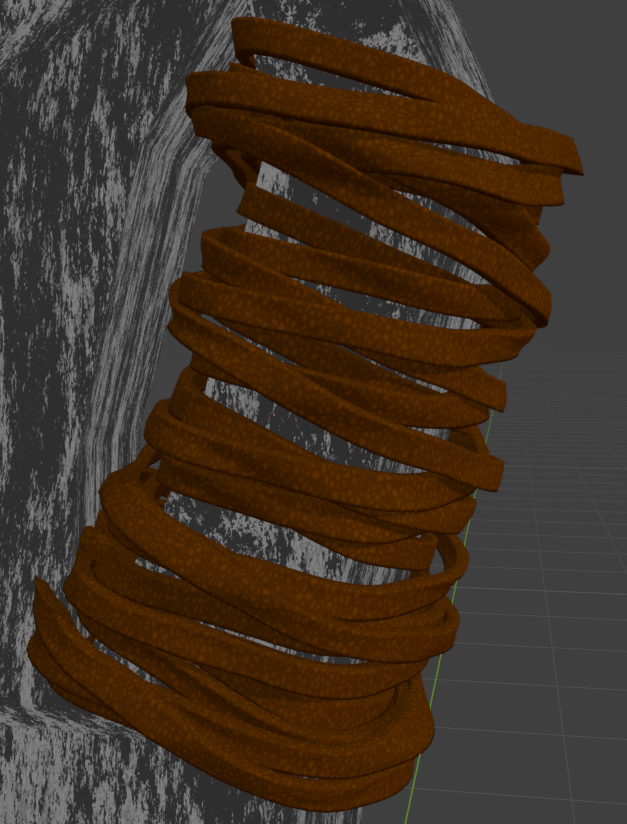
For the wraps around the hilt and the additional accesory to the blade, I downloaded a blender add-on called “Wrap Master” which helped me create the handles accurately.
This Add-on is extremely comfortable to use, being very customisable, allowing you to change the amount of loops and turns and how aligned they are to eachother and allowing snapping onto other objects making it easier to move
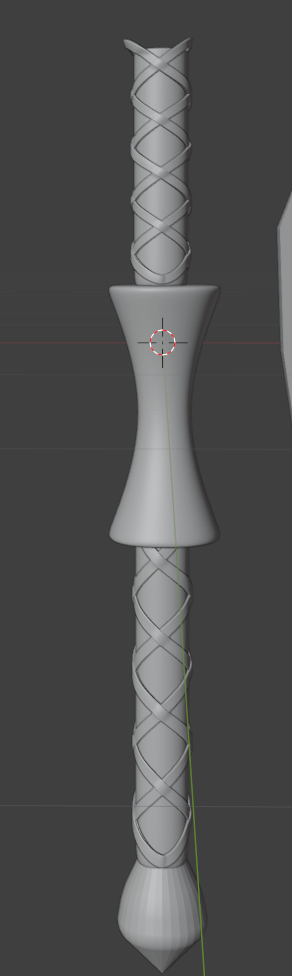
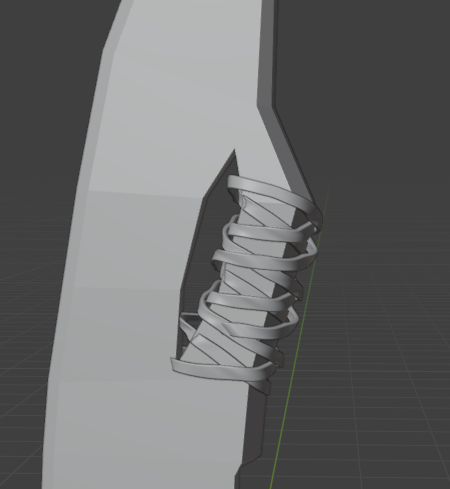
As well as this wrapping around the blade as an additional detail that adds character to the weapon.
Leather Body
This is the component that gave me the most trouble, it was such a complex component that I had realistically no idea what I was doing. I tried breaking down the basic shapes but it inevitably didn’t work, until I had decided to try and to almost trace it in a way where I used a subdivided cube with a couple faces deleted and try to mold that into the shape that I needed.
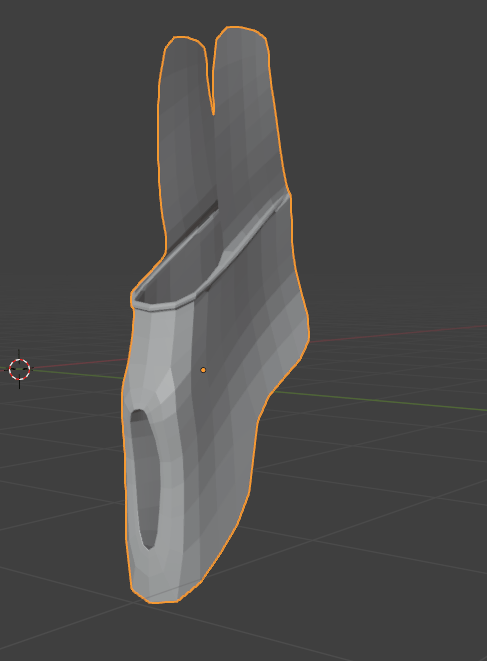
This was my first attempt at it where I attempted to make the rounded edge at the top but the top “Ear” parts were too short compared to the blade and also misaligned and couldn’t be easily realigned to which i decided to just start fresh again, using this model as a mold for the next one.
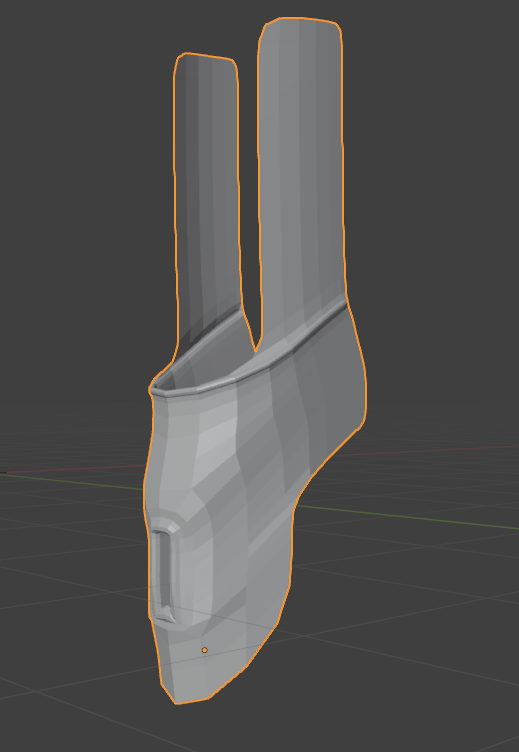
This is the second attempt, where I made the “Ears” longer and checked them in scale with the blade to make sure that they were correct, I believe I also did the topography more smoother and easier as well as attempting the extrusion over the edge of the top as well as the extrusion in where the smaller blade is supposed to be.
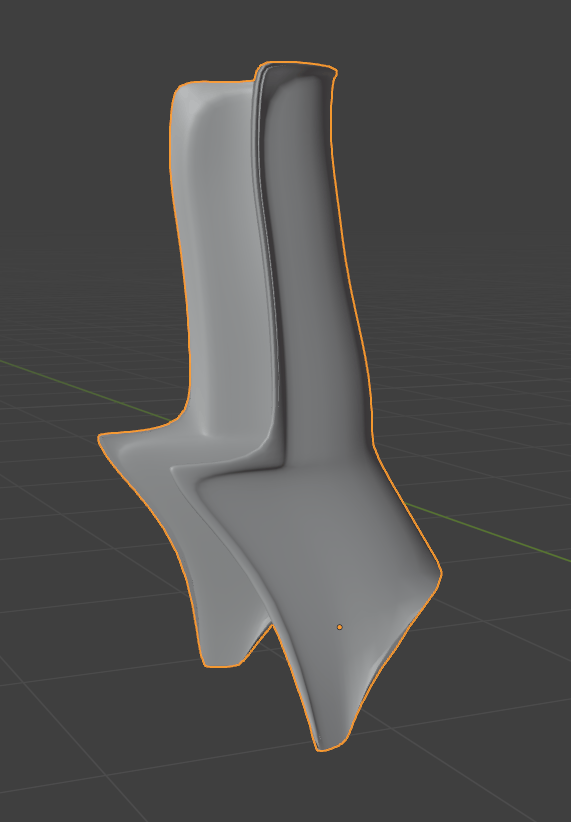
For the second part of the body i used the same technique for the previous piece and ended up with this result which I am very happy with.
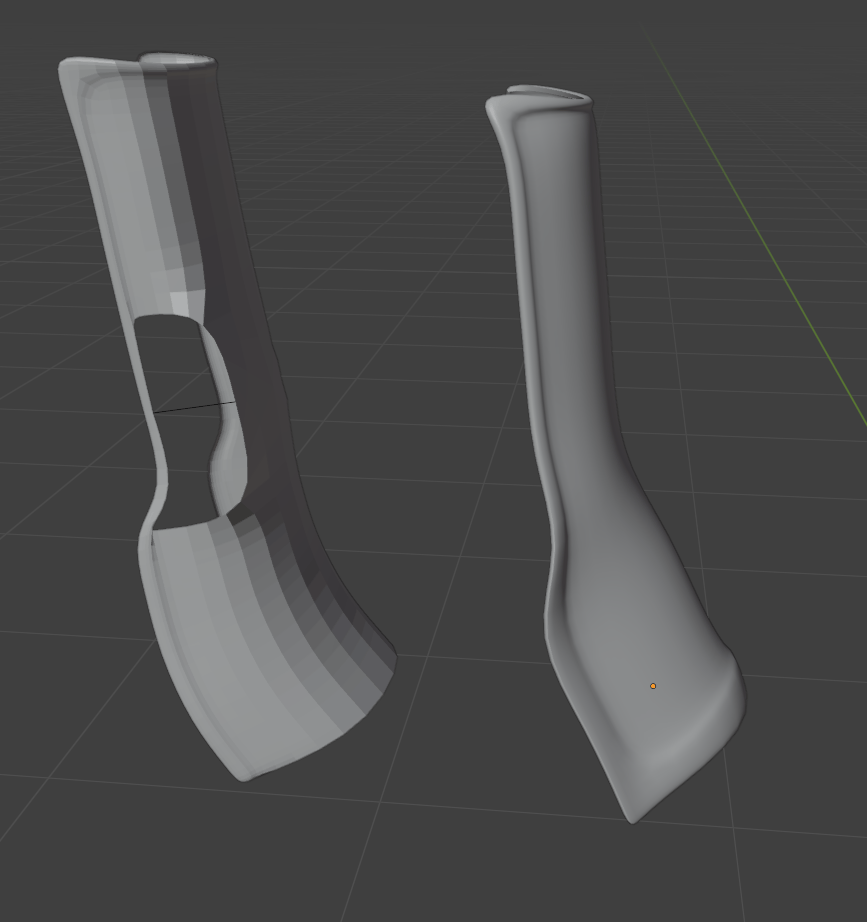
For the third piece of the body I tried using the same technique however somewhere along the way one of the faces was deleted due it being connected the wrong vertex, It was difficult to try and fix and so I just decided to start again and ended up with the result on the right which I smoothed out when I was finished with it.
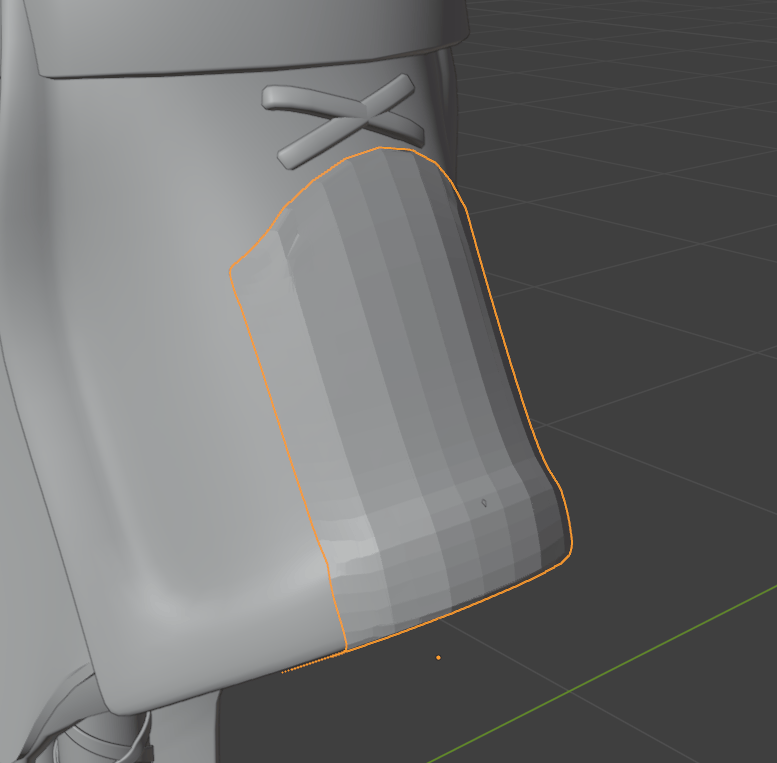
For the last part of the body, I used the same technique as the last pieces and then using the shrinkwrap modifier with a very small offset so that I can attach the wrap to the rest of the body.
I also added the little cross-wraps for decoration by just making very small cuboid rectangles and rotating them and adjusting their outer bend.
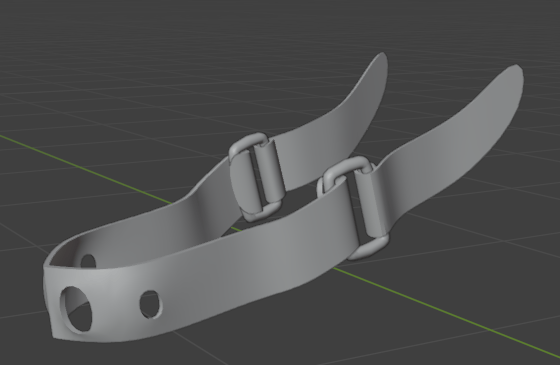
For this strap that goes on the bottom of the leather body as an accessory, I used the mirror modifier and had cut out the holes with a plain inset and deleting faces and I made the metal loop that holds the two pieces of leather together out of
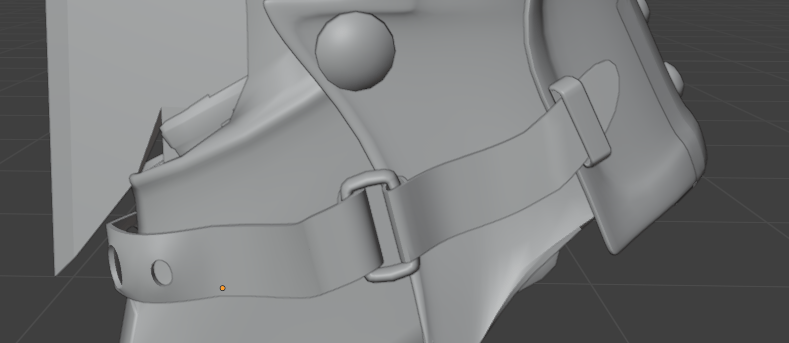
Here is how the strap looks when adjusted to fit the actual blade.
Final outcome of product
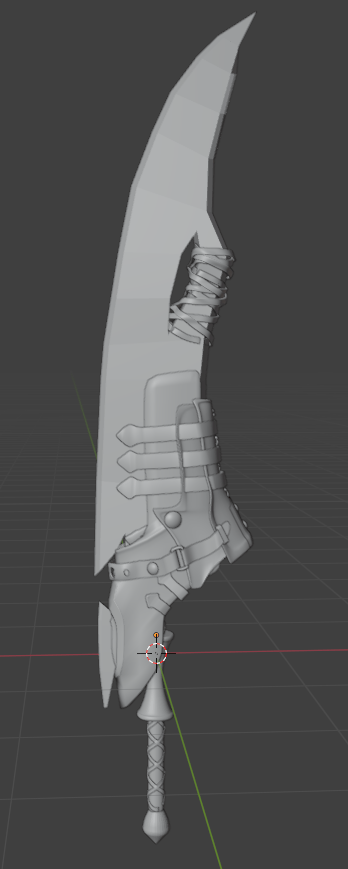
With nearly 40 separate pieces, I am both very happy and very confident with this model being finished in terms of modelling it. Next, I will be texturing, painting and adding materials onto it and then rendering it in 1080p.
Texturing and painting
The blade is the biggest part of the great sword and so I wanted to figure it out first as it was the most varying component so I wanted to get that done quickly. The side of the blade shows wear and tears as well as dents and I thought that I could try and recreate it by making a Rust-like texture but switching out the brown rust for 2 different shades of grey to show the dark grey as the base and the lighter grey as the wear and tear.
For this, I searched for a rust texture tutorial and followed this one: https://www.youtube.com/watch?v=wg2OKSiHng0
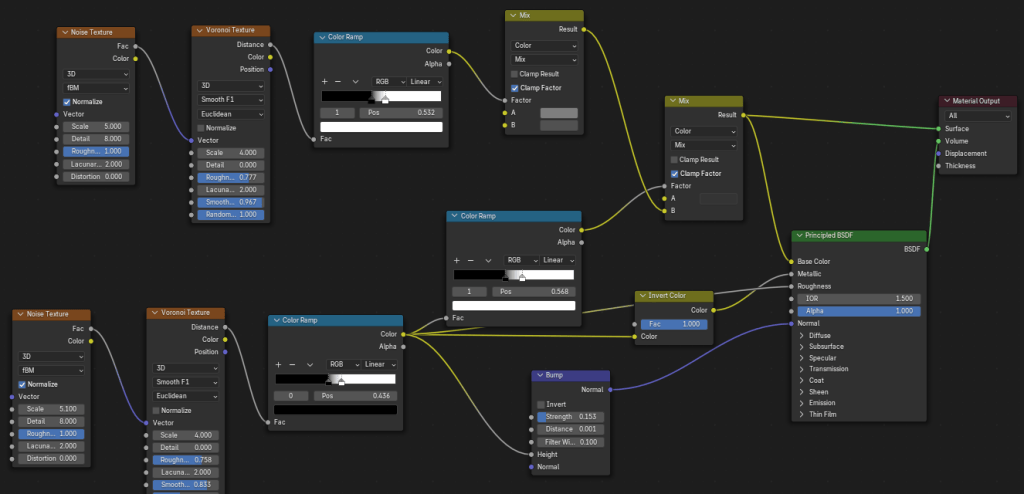
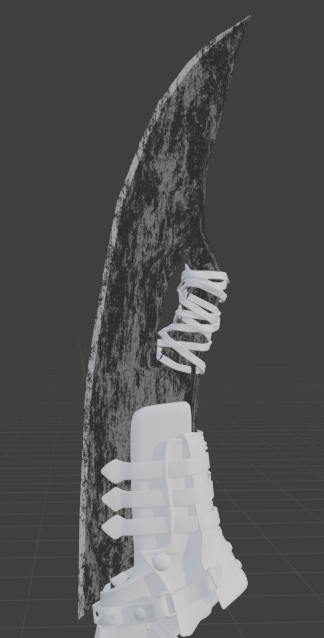
This is the shader node where I used nodes to create the full rust-like texture. I then proceeded to duplicate this into another material, slightly shifting the colours to be a much brighter colour and apply them separately to the faces of the edge of the blade. After creating the materials I used them again to texture the secondary blade the same
This is the result of the blade texture:
I also wanted to make a texture for the leather trying to accentuate it for it to not look very flat so I looked for a leather texture tutorial (CG Crab 2023) and found one which resulted in these nodes,
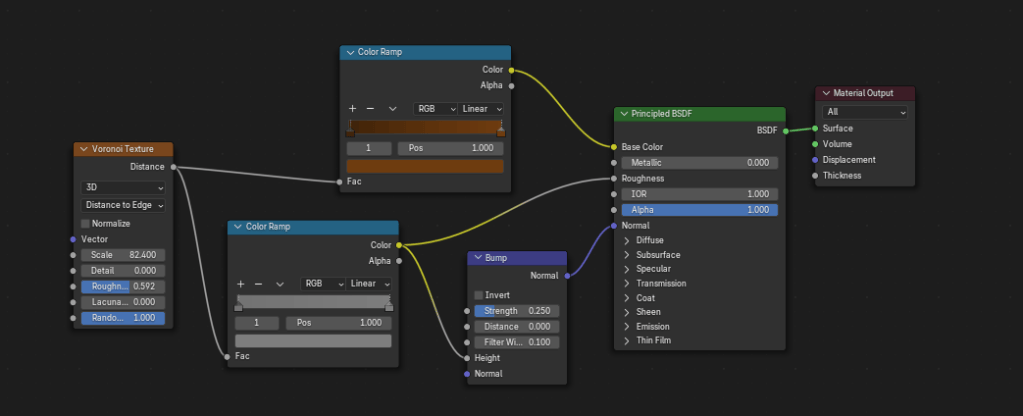
which resulted in this texture applied on most wraps on the great sword.
After hours of applying textures and even sculpt-painting some textures onto the leather, the texturing is done and I am very happy with it.
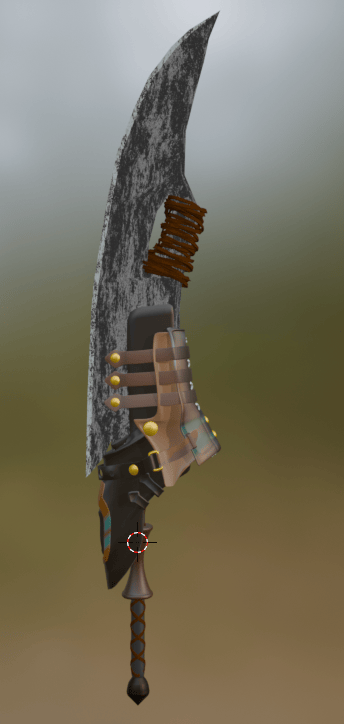
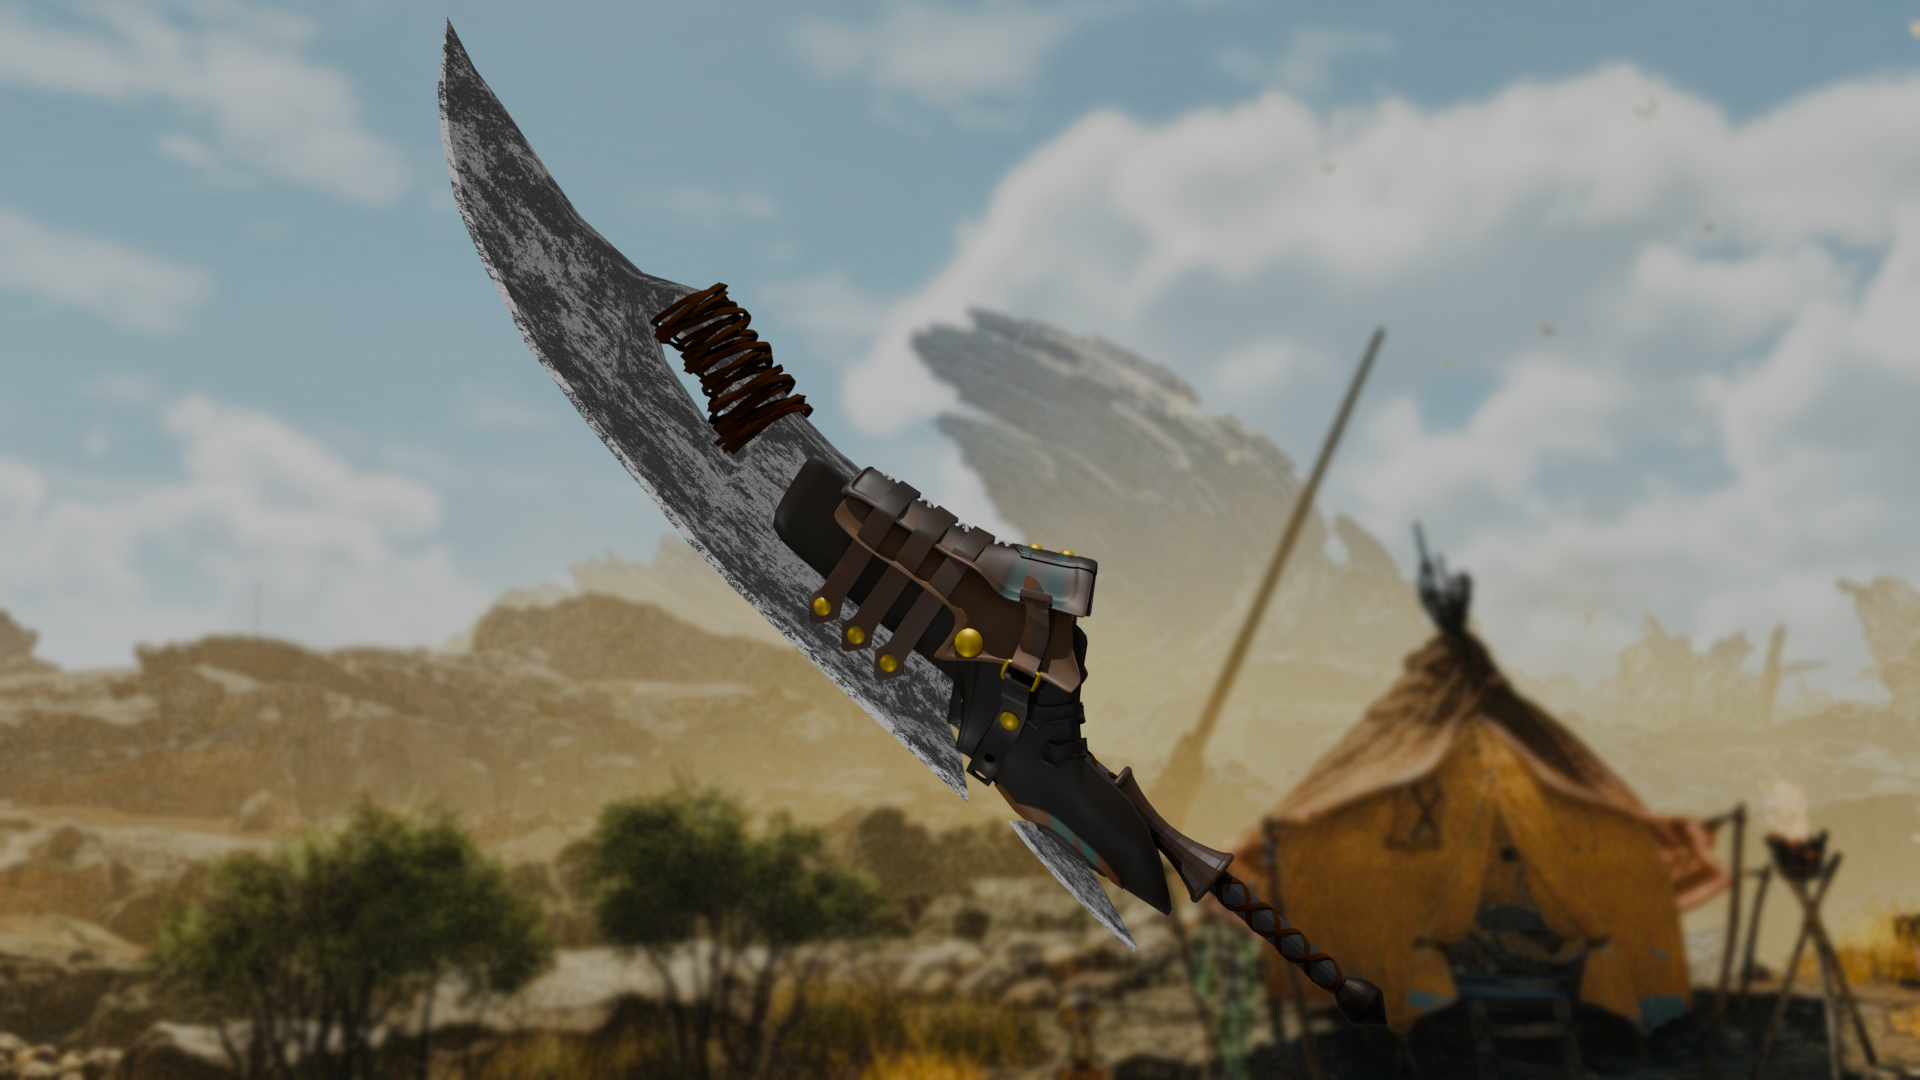
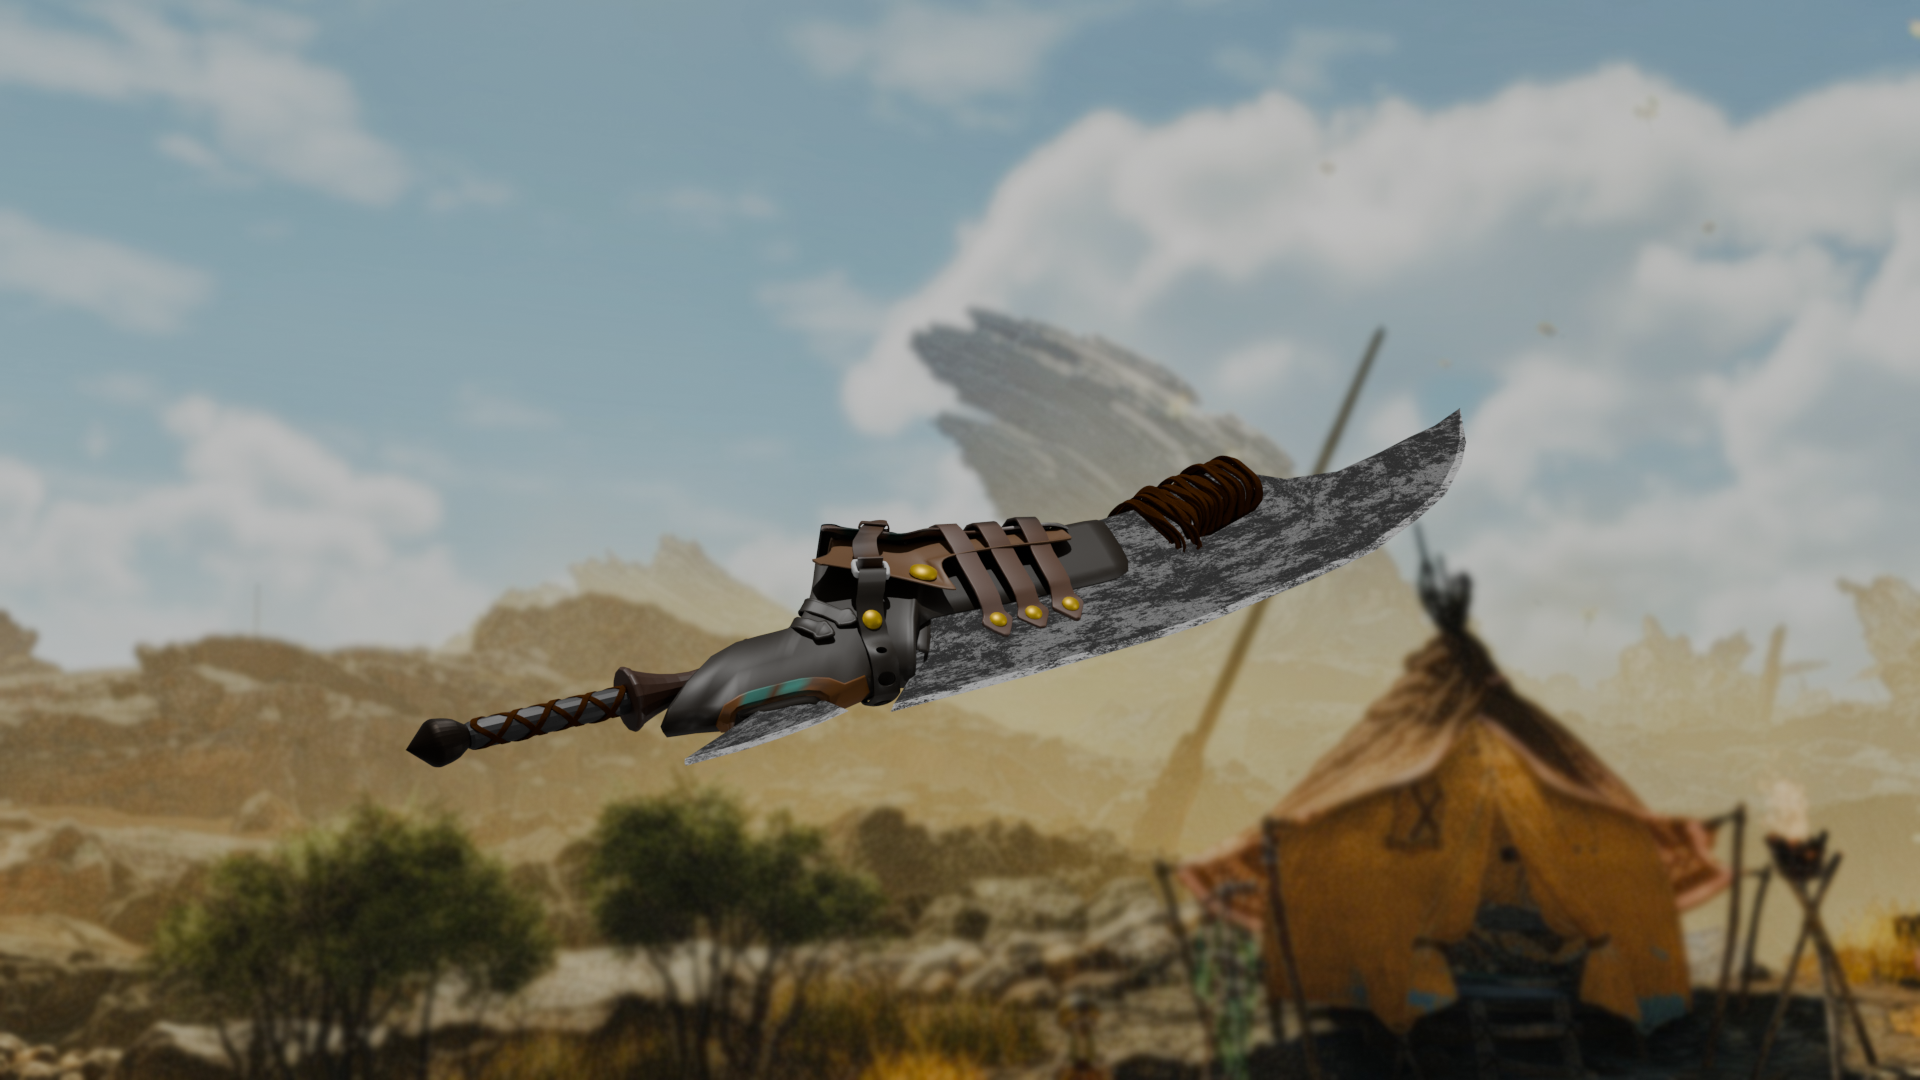
The final product rendering.
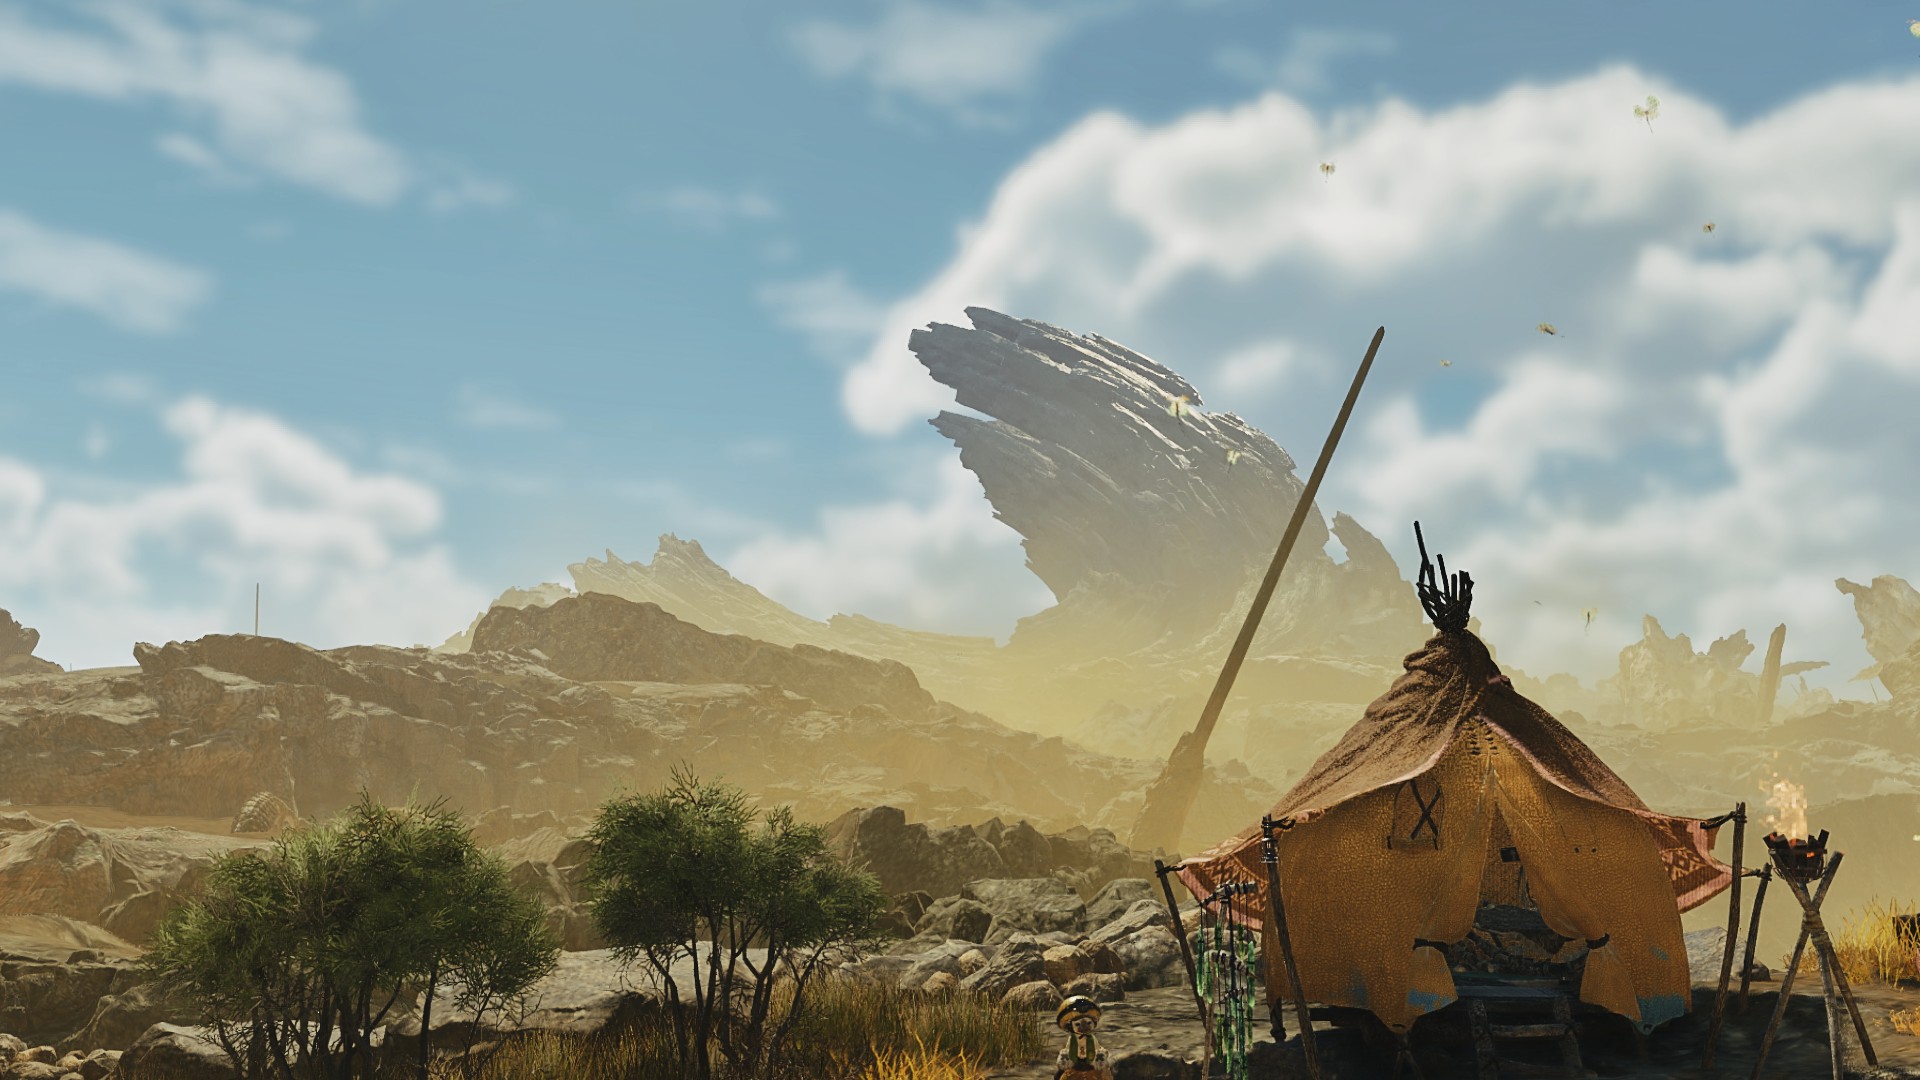
For my background, I decided to go into the game again and grab a screenshot of a far distance, I then proceeded to blur this background and I will be using that as the background for my render utilizing Depth of Field.
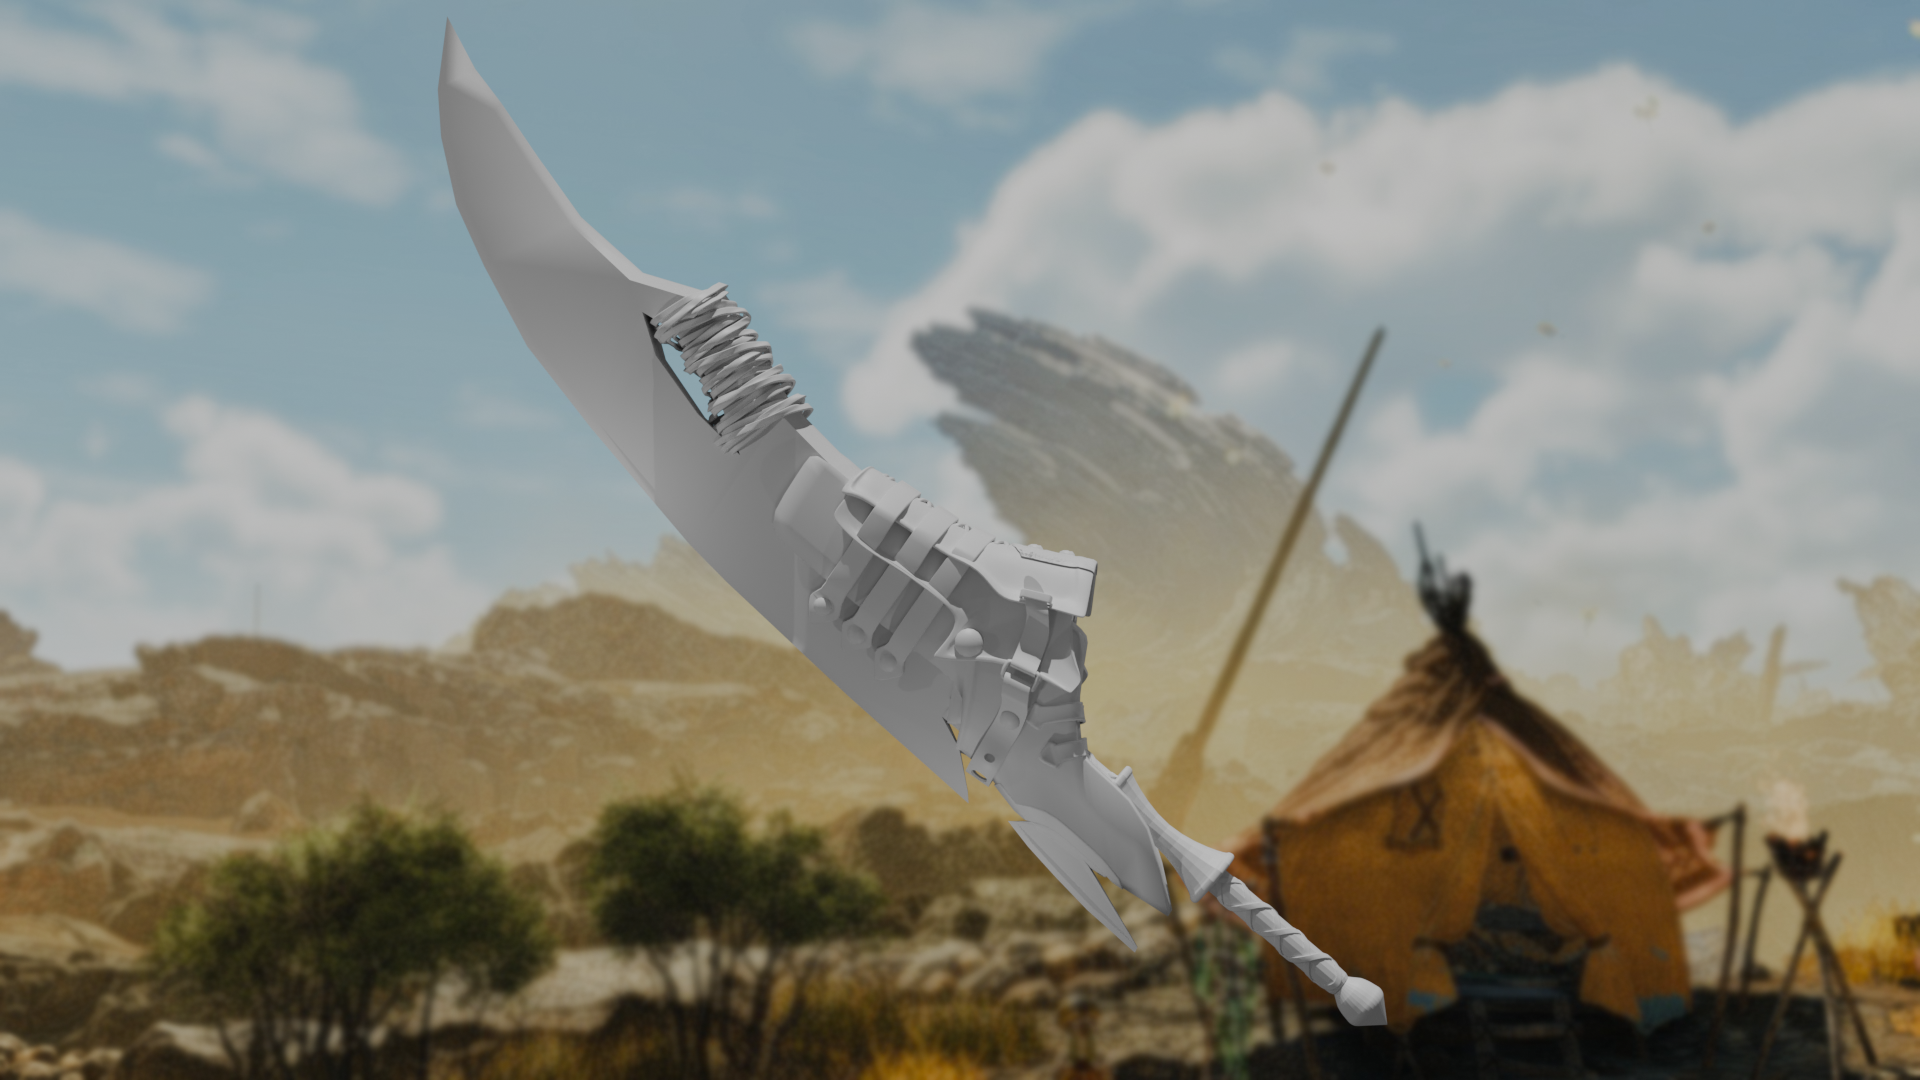
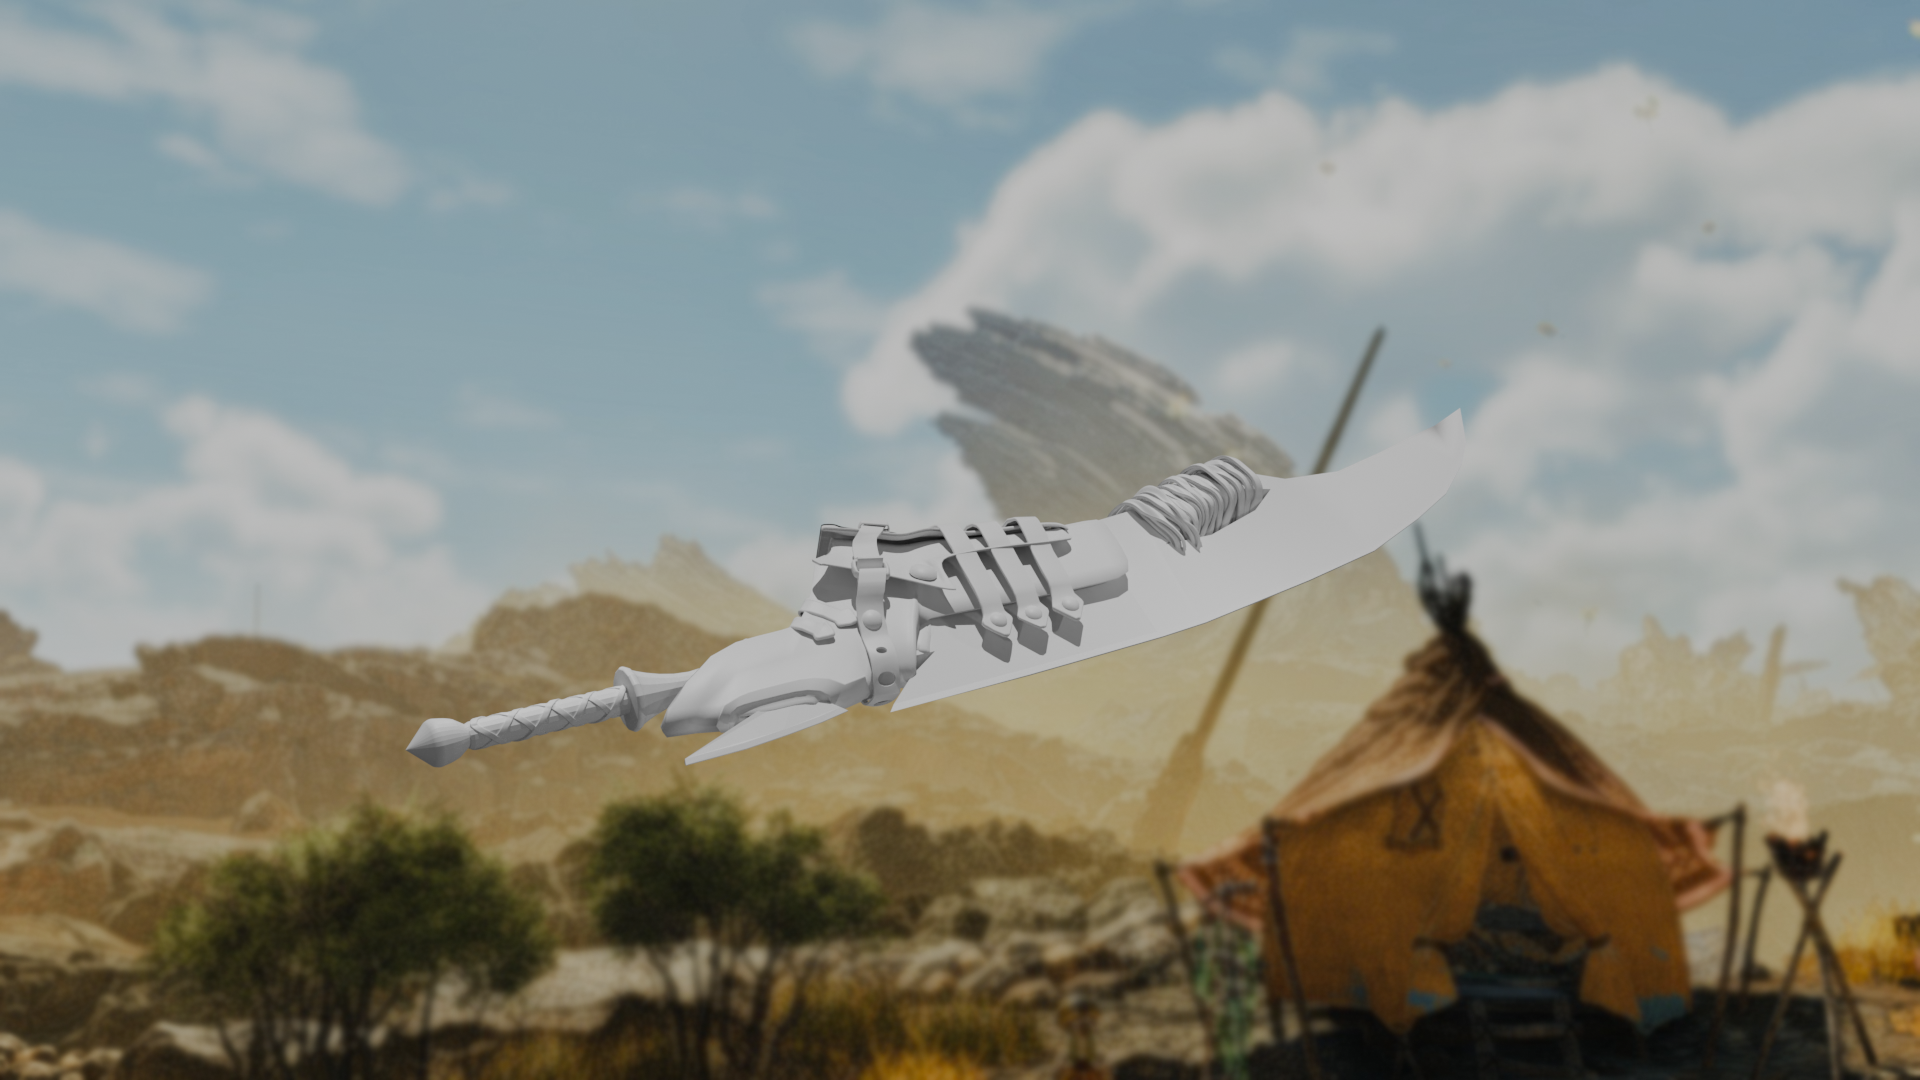
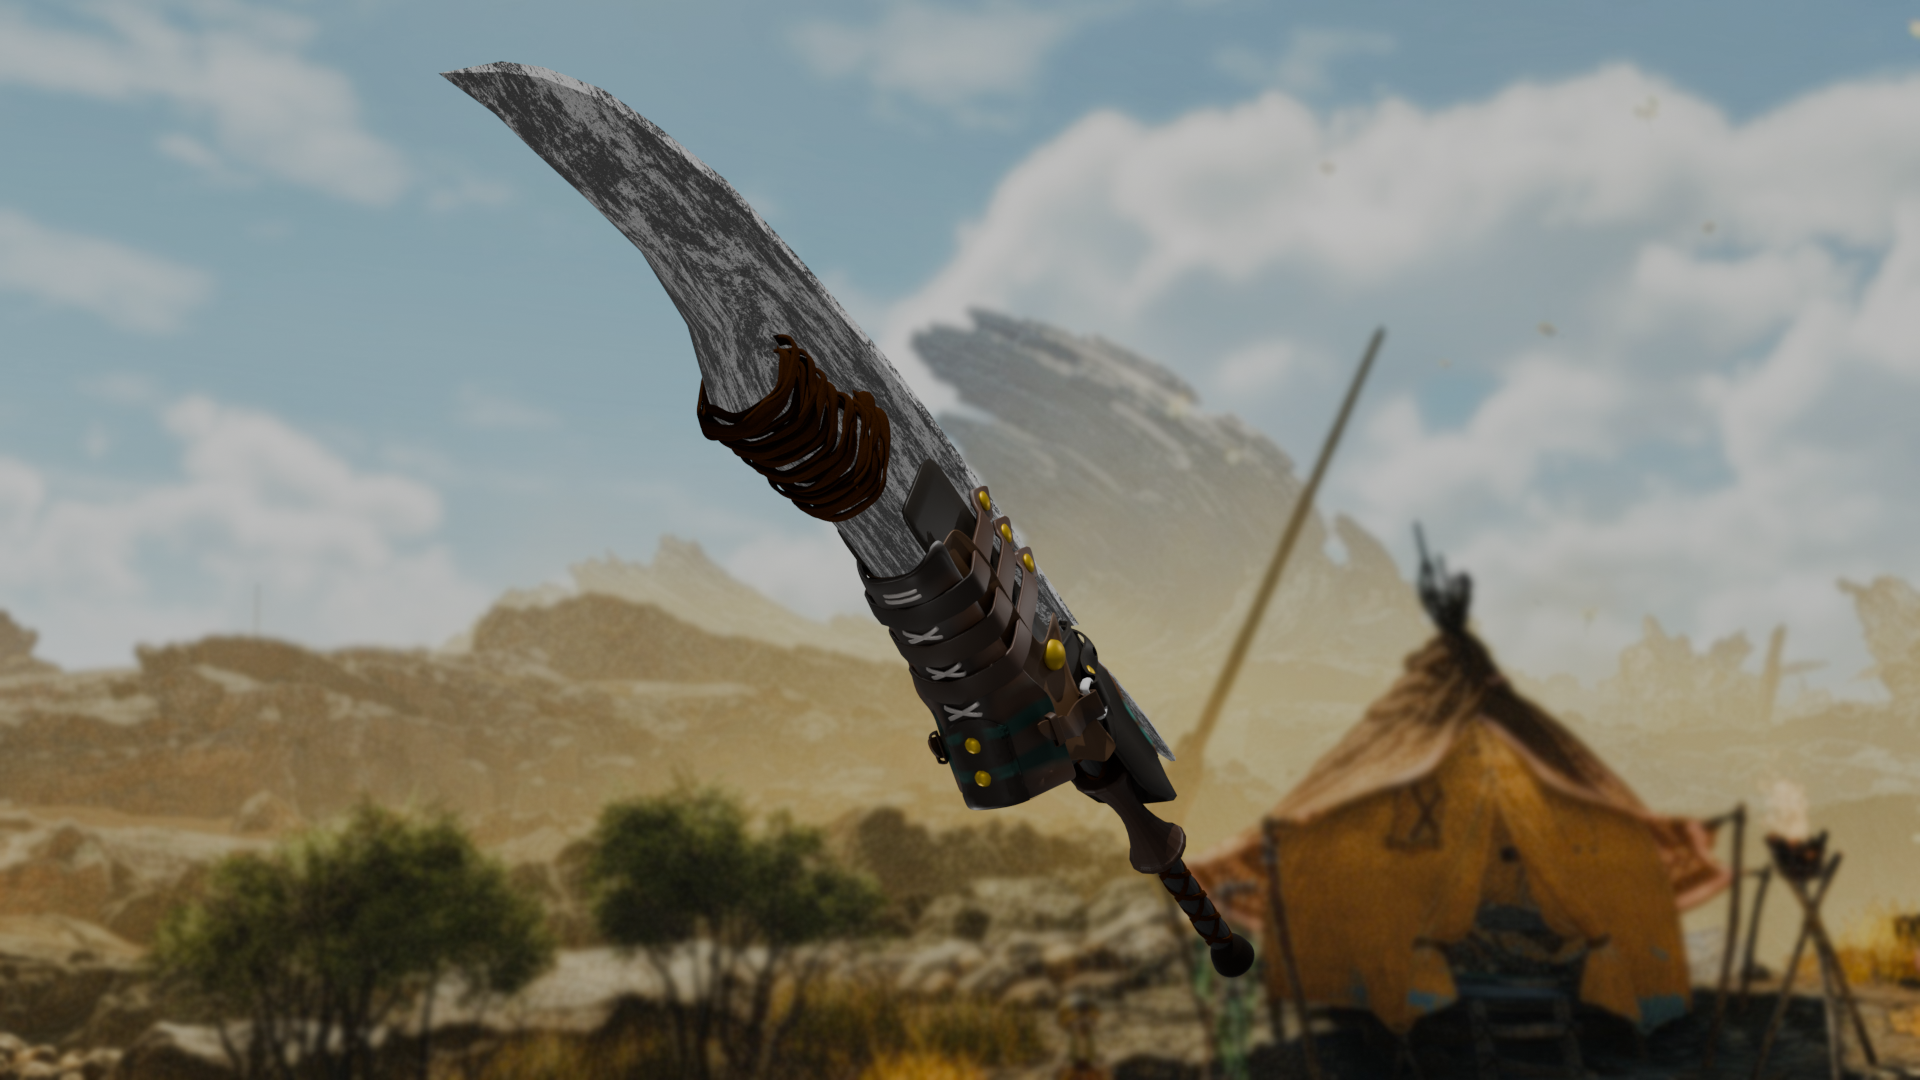
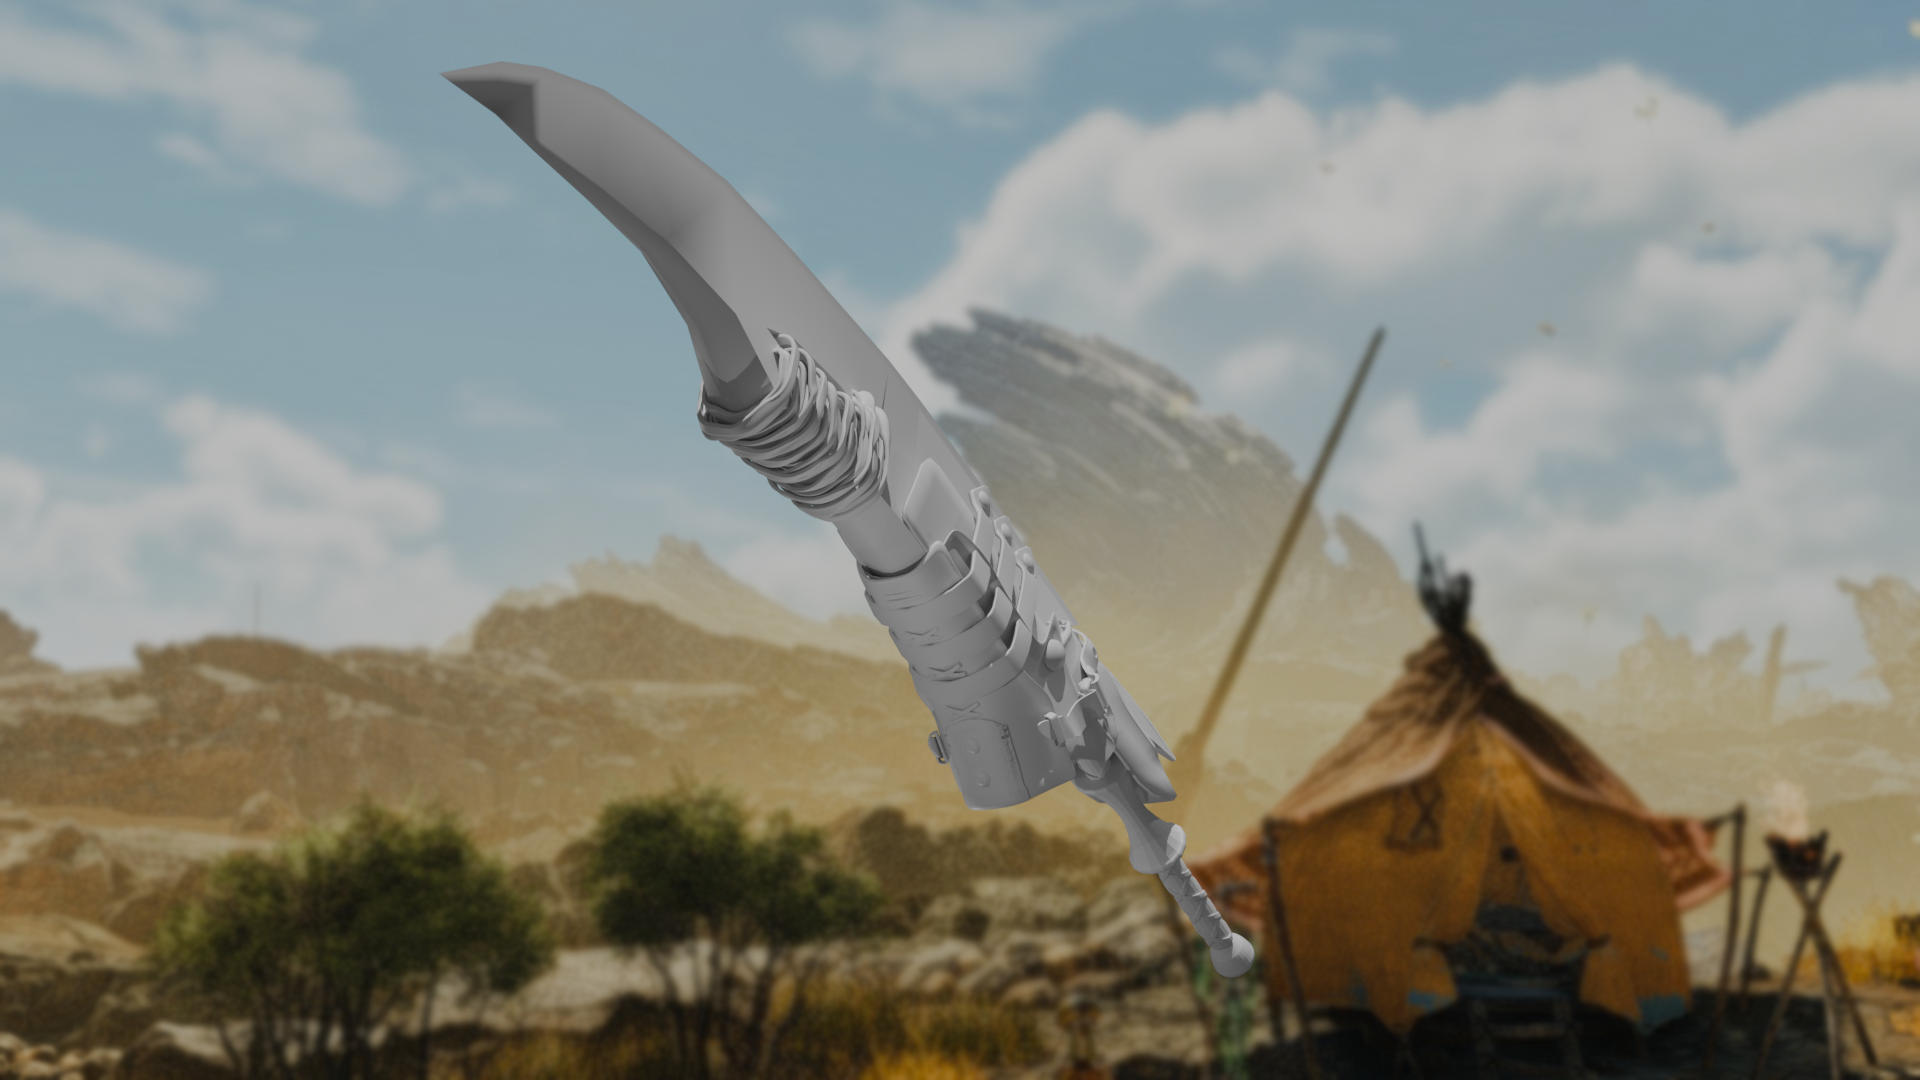
As the final result I have made multiple renders to show off the Greatsword in different angles and comparisons to clay models.
Blog Posts associated with this Unit
Conclusion
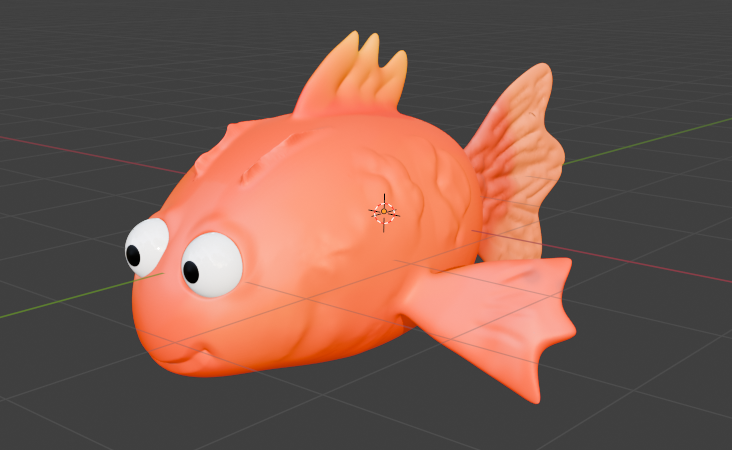
As a final word about this entire project is that I personally had a lot of fun making this and learning blender, seeing how I could progress over a month’s total of work and how the final product can be. This project was definitely very hard and it does feel like for my very first project on blender I probably bit off a lot more than I could chew and I found myself often just staring at blender for hours at a time because I just had no idea how to even get started on a section. The texturing was also a definitely interesting process with using nodes and mixing in the painting tool which I also enjoyed a lot.
This was a very enjoyable project to work on but it was also very challenging as this was my first time using blender but overall I personally am very happy with the final outcome and how it all turned out and I hope to using more blender soon.
Thank you very much for reading.
Works Cited
Capcom Co., Ltd. “Monster Hunter Wilds.” Monster Hunter Wilds Official Page, 28 Feb. 2025, www.monsterhunter.com/wilds/en-us/. Accessed 10 Sept. 2025.
CG Krab. “Blender: Easy Procedural Leather Material.” YouTube, 9 Aug. 2023, www.youtube.com/watch?v=7DbXGH0Ortg.
—. “Blender: Easy Procedural Rusted Metal Material.” YouTube, 8 July 2023, www.youtube.com/watch?v=wg2OKSiHng0.
MAN AT ARMS. “Cloud’s Buster Sword (Final Fantasy VII) – MAN at ARMS.” Www.youtube.com, 20 May 2013, www.youtube.com/watch?v=xogheZdAO18. Accessed 24 Jan. 2024.
The Deep Voice Show. “How to Use the Zweihander Montante Great Sword.” YouTube, 29 May 2018, www.youtube.com/watch?v=1kpJtTGqyUI.

